How To Create Anniversary Badge Inside Illustrator?
In this tutorial I will show you how to Create Anniversary Badge Inside Illustrator? this tutorial is for any one basic and advanced user, I will introduce the usage of shape tools , gradient tool to create golden gradient for our badges and many useful shortcuts and tips.
Create Anniversary Badge Inside Illustrator
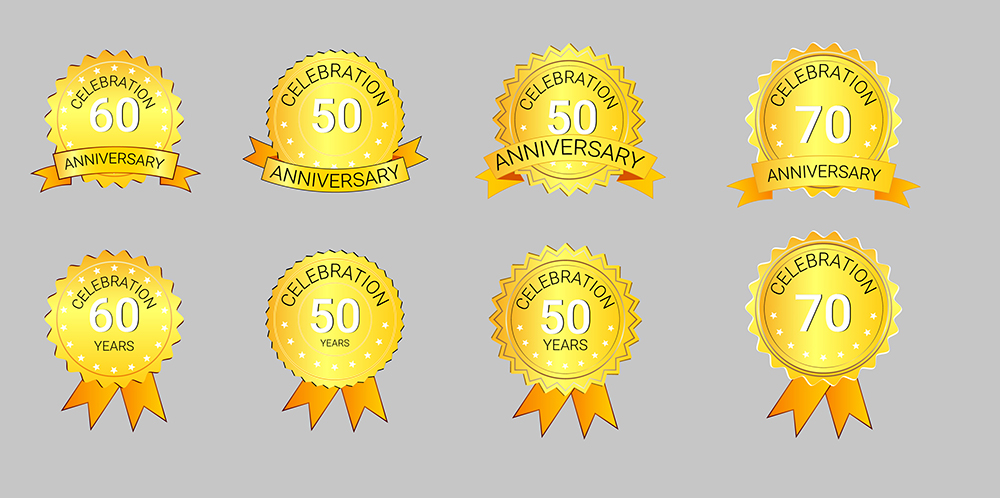
lets see what we will going to create in this tutorial, I will create only one of the badges, then you can create other by yourself.
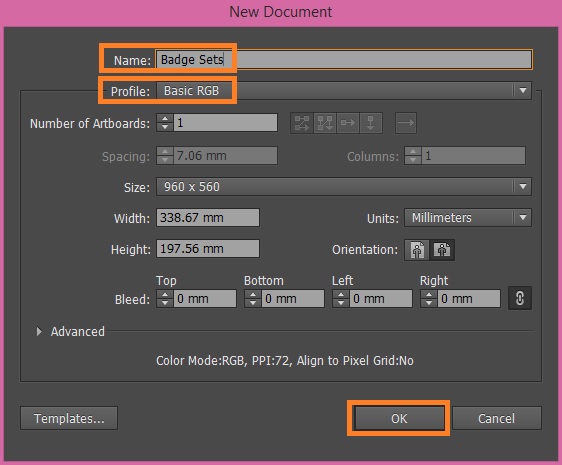
1. Open a basic RGB document, go to File > New (Ctrl+N) name your document Badge Sets and set the other option as the image bellow, click OK.
2. Pick the Rectangle tool (M) and draw a shape the size of your art board and set the stroke to non and the fill to light gray use this hex code (DBDBDB). Name your layer Background, as bellow.

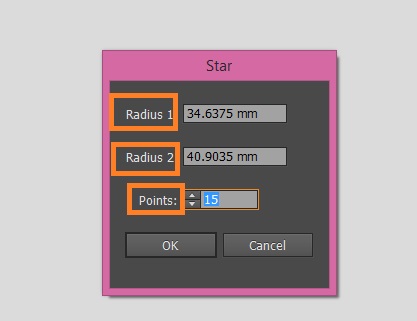
3. Now create new layer and name it Badge Sets then pick the Star tool to create the main part of our badge, so to create the main body of the badge click on the art board your Star tool should be selected, an small dialog box will open and set the Radius 1: (35 mm) Radius 2: (40 mm) Points (15).
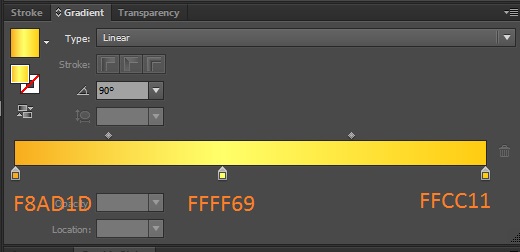
4. Right! Now change the fill color of your badge to gradient and use these hex codes to make the badge golden, so to set all the gradient setting well follow the image bellow.
5. OK, make a copy of the badge layer (Ctrl +C) and (Ctrl + B) and set its color to dark orange (D8A607) then scale and rotate it a little bit till to give it stroke or depth. Your badge should looks like bellow.

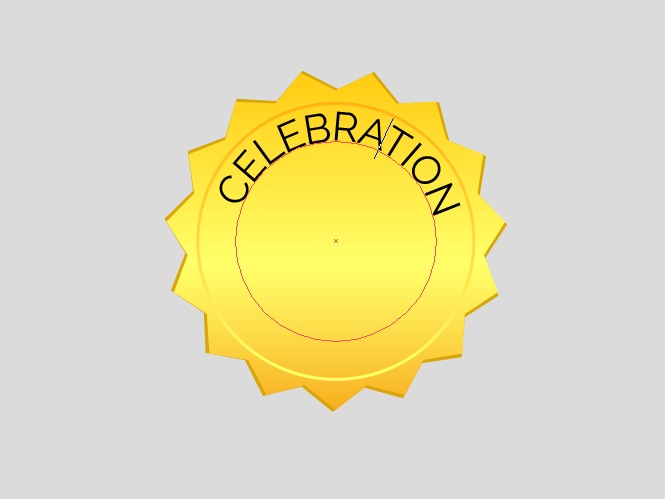
6. Now pick the Ellipse tool to draw a circular path for our text, the circular path should be inside the badge shapes then pick the Type on a Path Tool to add the text on the path. As bellow.
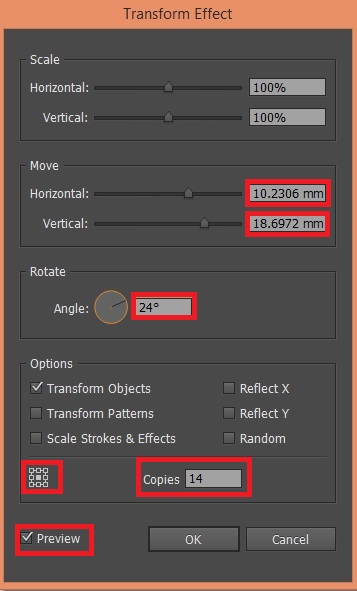
7. It is time to add some stars around the badge, it is very easy to do draw an star with Star tool then go to Effect> Distort & Transform> Transform and set all the value as bellow, try to play around transform option to be familiar with Transform because it is the most wanted option of Illustrator.
8. Now go to Object> Expend Appearance and place it on top of the badge and delete some of the stars which are on top of the text, remember that when you Expend that layer Ungroup (Shift+Ctrl+G) it two times to be able to delete some part of the layer.

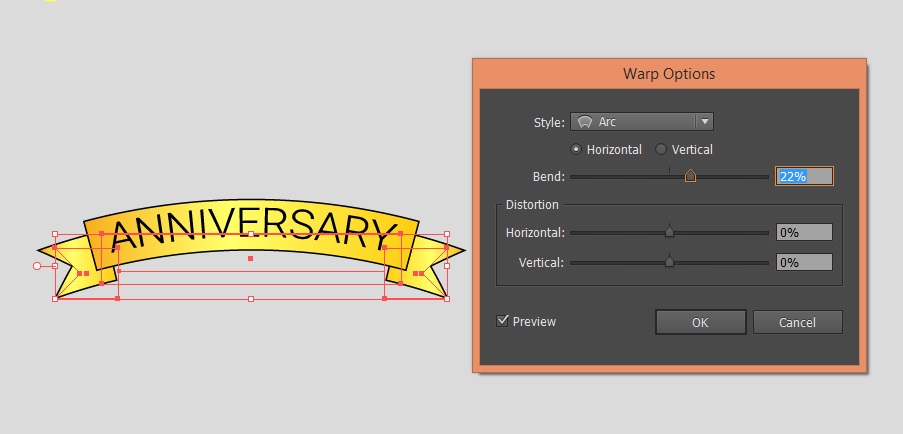
9. OK, now pick the Rectangle Tool and draw a rectangle, then place your text on top that, select both and Group it (Ctrl+G). Now go to Effect> Warp> and set the value as bellow.
We are done! Place the ribbon on its place then see the result, and do the other badges by your self. Thank you very much for following hope you enjoy it, if you have any question please ask in comment section.
