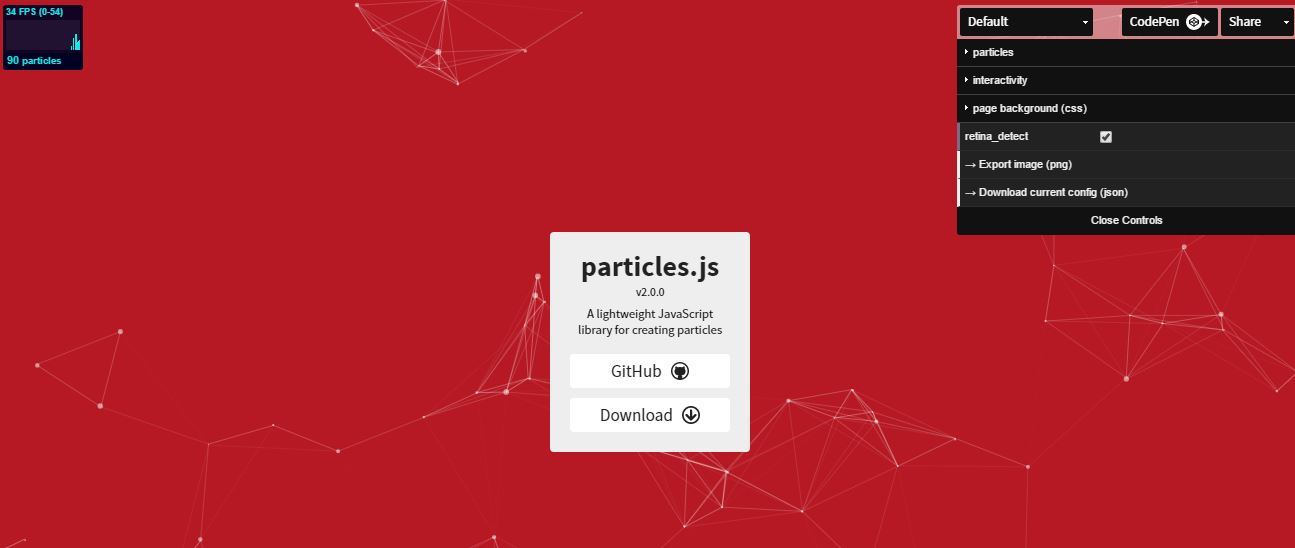
Particlesjs is an amazing JavaScript library that will let you make particles backgrounds. There are different library for creating particle, but Particlesjs is at the top and easy to use. This article will teach you step by step on how to use particlesjs library. You will enjoy learning and using this amazing library. Before diving into code and learning it, let’s see and example.
Particlesjs best example
[codepen_embed height=”365″ theme_id=”dark” slug_hash=”eZXGeg” default_tab=”result” user=”Hujjat”]See the Pen <a href=’http://codepen.io/Hujjat/pen/eZXGeg/’>Practicing particlesjs</a> by Hujjat Nazari (<a href=’http://codepen.io/Hujjat’>@Hujjat</a>) on <a href=’http://codepen.io’>CodePen</a>.[/codepen_embed]
You probably have seen such an example or any website using this kind of background. So now let’s learn how to use particlesjs library.
How to Use Particlesjs Library?
To use particlesjs, first you have to create it. You can go to particlesjs site and start creating your own particle. It has an visual option panel that will let you customize it the way you want. You must take a few hours practicing and mastering the options. Change every option possible to understand how it works and how it changes.

We will customize is a little and than use it as an example. After you learned how to use it in real project. you can add you own particle example. After customizing, click on the right top Codepen button. It will open your project in a new pen. After that you can customize and give it a name if you want.
Here is how we customized:
[codepen_embed height=”265″ theme_id=”dark” slug_hash=”ONqrRx” default_tab=”result” user=”Hujjat”]See the Pen <a href=’http://codepen.io/Hujjat/pen/ONqrRx/’>particles.js practice</a> by Hujjat Nazari (<a href=’http://codepen.io/Hujjat’>@Hujjat</a>) on <a href=’http://codepen.io’>CodePen</a>.[/codepen_embed]
Now let’s add it in our local project.
You need to create three files; one for HTML, one for JavaScript and one for CSS. After creating those files, make sure you link the JavaScript and CSS to HTML page.
In your HTML file, all you need is to have a tag with an id of particles-js( you can name it anything you want).
<div id="particles-js"></div>
In your CSS file, just write the partilce background code
#particles-js {
  position: absolute;
  width: 100%;
  height: 100%;
  background-color: #766dcc;
  background-image: url("");
  background-repeat: no-repeat;
  background-size: cover;
  background-position: 50% 50%;
}
For JavaScript section, first you need to add the partilclesjs library file. You can use cdn as well. Here is the cdn for that
<script src="http://cdn.jsdelivr.net/particles.js/2.0.0/particles.min.js"></script>
After adding particlesjs file, you can write the code generated on codepen in JavaScript section. You don’t need to add all the code, just the particle function with all it’s property.
It will look like this: ( sure your code is similar to this ).
		particlesJS("particles-js", {
		  "particles": {
		    "number": {
		      "value": 137,
		      "density": {
		        "enable": true,
		        "value_area": 800
		      }
		    },
		    "color": {
		      "value": "#ffffff"
		    },
		    "shape": {
		      "type": "polygon",
		      "stroke": {
		        "width": 0,
		        "color": "#000000"
		      },
		      "polygon": {
		        "nb_sides": 5
		      },
		      "image": {
		        "src": "img/github.svg",
		        "width": 100,
		        "height": 100
		      }
		    },
		    "opacity": {
		      "value": 0.5,
		      "random": false,
		      "anim": {
		        "enable": false,
		        "speed": 1,
		        "opacity_min": 0.1,
		        "sync": false
		      }
		    },
		    "size": {
		      "value": 3,
		      "random": true,
		      "anim": {
		        "enable": false,
		        "speed": 40,
		        "size_min": 0.1,
		        "sync": false
		      }
		    },
		    "line_linked": {
		      "enable": true,
		      "distance": 150,
		      "color": "#ffffff",
		      "opacity": 0.4,
		      "width": 1
		    },
		    "move": {
		      "enable": true,
		      "speed": 11.22388442605866,
		      "direction": "none",
		      "random": true,
		      "straight": false,
		      "out_mode": "bounce",
		      "bounce": false,
		      "attract": {
		        "enable": false,
		        "rotateX": 600,
		        "rotateY": 1200
		      }
		    }
		  },
		  "interactivity": {
		    "detect_on": "canvas",
		    "events": {
		      "onhover": {
		        "enable": true,
		        "mode": "repulse"
		      },
		      "onclick": {
		        "enable": true,
		        "mode": "push"
		      },
		      "resize": true
		    },
		    "modes": {
		      "grab": {
		        "distance": 400,
		        "line_linked": {
		          "opacity": 1
		        }
		      },
		      "bubble": {
		        "distance": 400,
		        "size": 40,
		        "duration": 2,
		        "opacity": 8,
		        "speed": 3
		      },
		      "repulse": {
		        "distance": 200,
		        "duration": 0.4
		      },
		      "push": {
		        "particles_nb": 4
		      },
		      "remove": {
		        "particles_nb": 2
		      }
		    }
		  },
		  "retina_detect": true
		});
Now you are good to go. Just open your project in browser and it will work perfectly. It was this easy to use particlesjs library.
Conclusion
We hope it has been informative for you. If you have any question related this topic or you face any problem on how to use particlesjs library, feel free to comment it bellow. 🙂