How to See Wi-Fi Password on Windows 11 ?
As security concern increases, you may set a more complex password for your home, office, or public Wi-Fi. After some time, if you needed your password or your friend asked about it, you may not remember it. That’s where you can check the saved password of your network in your computer running the Windows Operating System. We will cover the two ways to see Wi-Fi password on Windows 11.
If you are using Windows 10, you can check this article; How to Find Wi-Fi Password on Windows 10?
1. See Wi-Fi Password Using Command Prompt
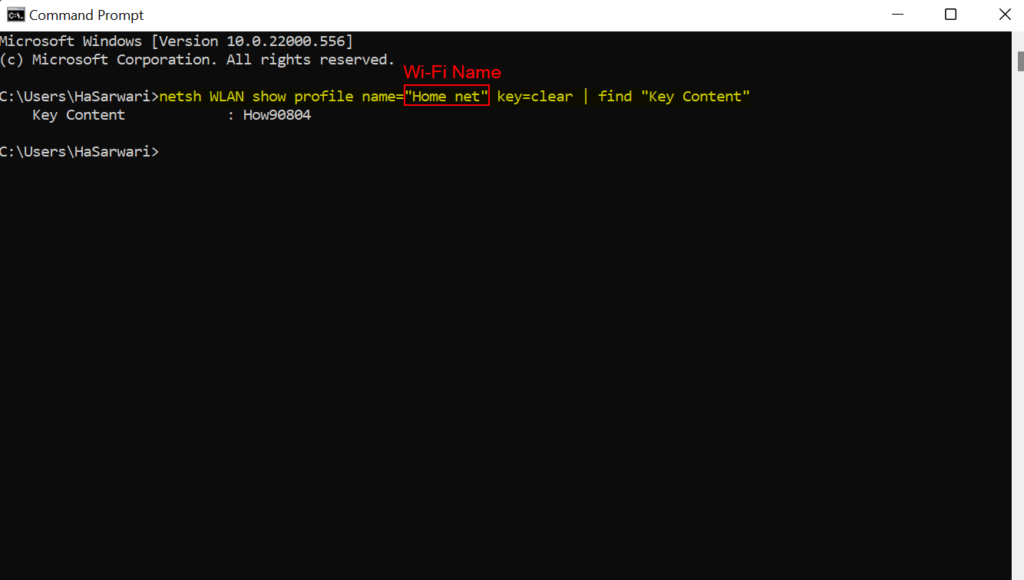
If you are an IT Professional, using Command Prompt or PowerShell is an arbitrary way to see your wireless network password on Windows 11. To prevent possible mistakes that may occur because of the wrong spelling, you can copy the below command and paste it into the command prompt, and edit the network name.
- Search Command Prompt in the Search box or find it in the Start Menu and open it. Write netsh WLAN show profile name=”Name_of_the_Network” key=clear | find “Key Content” in the command prompt window and enter.

- To see more details about your network, write
netsh WLAN show profile name="Name_of_Network" key=clearand press enter.
2. Show Wi-Fi Password with Control Panel
The second traditional way to see your Wi-Fi Password on Windows 11 is through Control Panel. To do that:
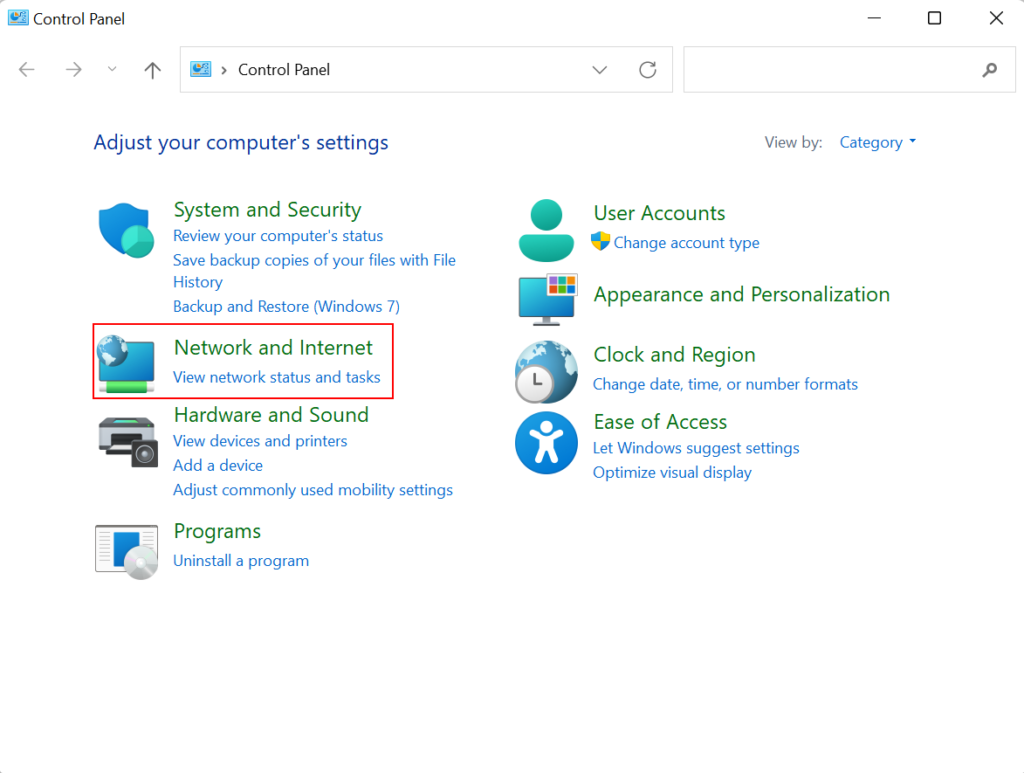
- Open the Control Panel on your computer and click on Network and Internet.

- Click on Network and Sharing Center.
- In a new window, click on the active network (Connection Wi-Fi)
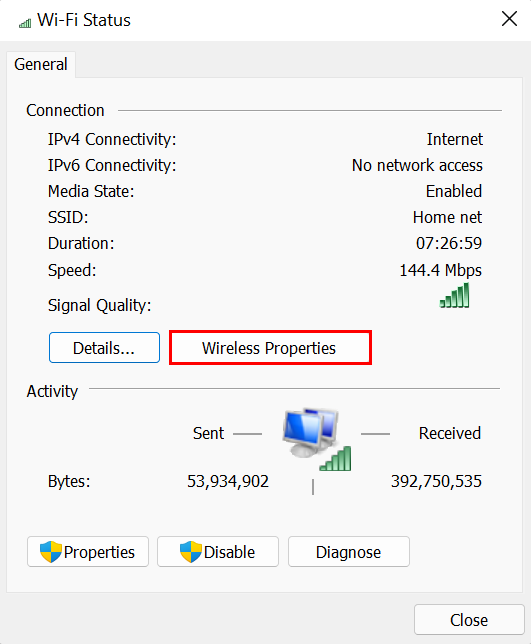
- A new tiny window (Wi-Fi Status) pops up; you click on the Wireless Properties.

- Again a tiny window (Wireless Properties) shows up, click on the Security tab on the top of that window and check the Show characters option.
With the above two-method, you can easily find the password of your computer network that you have forgotten. Now, it is not necessary to reset your network router. Write down your questions and recommendations in the comment section of this page.
