If you read my old article about creating bootable USB with Diskpart for Windows and Bootable USB for Linux, then you know the usage of a bootable USB. So in this article we are going to make a bootable USB with PowerShell command for Windows operating system.
A bootable USB contains the Windows setups files and you can boot your system through USB flash drive. It works better and faster than DVD, or you may not have access to DVD but a USB drive is always near your hand.
Make Bootable USB with PowerShell
First you need to connect your USB drive to your computer. Windows 10 is more than 4GB, so try to use a USB flash drive that has at least 8GB capacity.
1. Press Windows button and type PowerShell then press Ctrl+Shift and press enter to run PowerShell as administrator.
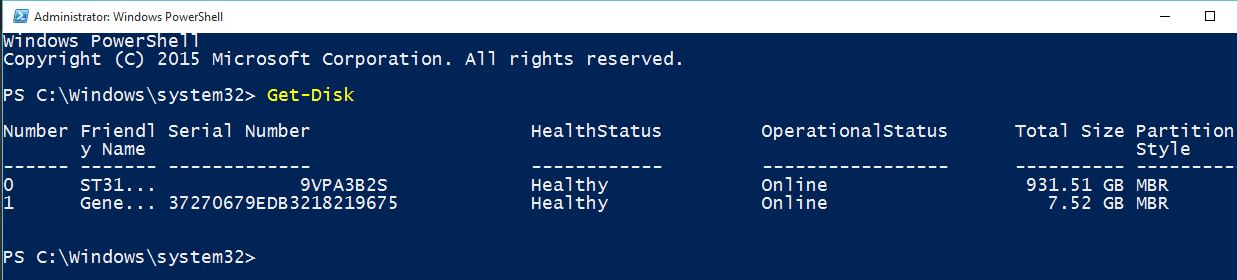
2. Type “Get-Disk” and press enter to see the connected USB flash drive and your system hard disk.
3. To format a USB, type “Clear-Disk 1 -RemoveData” and press enter. It will remove the USB files. Make sure that assign the USB number not your hard disk.

4. The disk cleaned successfully. Now type “New-Partition -DiskNumber 1 -UseMaximumSize -IsActive:$true” and press enter to create the partition and activated as active disk for booting system through USB.

5. Now type “Get-Volume” and press enter to list all volumes or drives. Find the exact drive you want to format.

6. So, type “Format-Volume -DriveLetter K -FileSystem NTFS” and press enter to format the drive.

Finally the USB drive has formatted successfully. To install Windows with this USB, you must copy the contents of Windows image or DVD to this Bootable USB drive.
If you don’t have download the Windows image yet, try to download from download Windows 10. Hope you get something new form this post. If you want to learn more follow the PowerShell Articles.
Hello, thanks, dear sir but It’s giving me an error
This is way does not show the drive letter. Now, what can I do?
Try this:
run >> cmd
type “diskpart” (no quotes of course)
type “list volume”
You will see a list of all available volumes that are attached to your computer. Look for the one that does not have a drive letter and make note of its volume number.
Type “select volume #” where # is the number of the volume that you need to give a drive letter.
type “assign” to give it the next free drive letter.
type “exit”
That should do it.
I have another question. How do I install windows power shell with my install of Windows 10? This all on a USB stick. Also, including windows drivers and updates?
I didn’t get the point of you question? You want to make a Windows 10 bootable USB with drivers and update packages?
This is inane; all this, to change one flag on the disk. Additionally, what people usually mean to do is to dd a .iso file to the drive to boot it (esp. UEFI images,) which is definitely not here or in the PowerShell articles.