Install Active Directory On Windows Server 2022 Using PowerShell
Using PowerShell to install Active Directory Domain Services (AD-DS) on Windows Server 2022 helps you install it quickly. It is better to rename your server and assign a static IP address before installing the active directory.
Assign Static IPv4 and Rename Server Using PowerShell
It is important to assign a static IP address to a server computer because dynamic addresses change after some time and it can cause problems. Another important thing is to rename your server before installing the active directory. It will take a long process to rename your server after you install the active directory. Follow the steps below to assign an IPv4 and rename the server.
1. Run PowerShell as administrator. If you are using GUI versions of Windows Server, press Win+R to open the Run and type PowerShell then hit Ctrl+Shift+Enter. If you are using the core version of Windows Server, type PowerShell in the command prompt and hit Enter. The PS sign will be added at the beginning of your command which means PowerShell is open. Then execute the command Start-Process PowerShell -Verb Runas to run PowerShell as administrator.
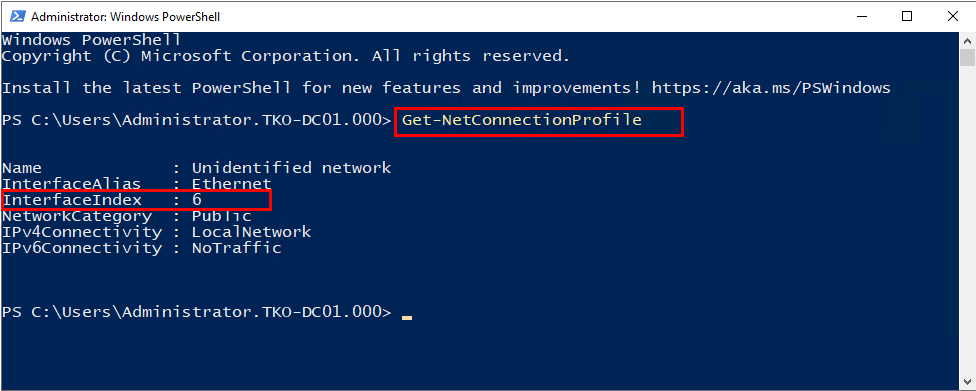
2. Type the Get-NetConnectioProfile to find the InterfaceIndex number.

3. InterfaceIndex number for every network adapter is different. When you got the proper InterfaceIndex type the command New-NetIPAddress -InterfaceIndex 6 -IPAddress 192.168.0.2 -PrefixLength 24 -DefaultGateway 192.168.0.1 and press Enter key to assign an IPv4 address. This is the network setting for this lab, you should assign an Ip address according to your own network setting.
Click to know more about How To Configure IP Address With PowerShell?
4. Type the Rename-Computer -NewName "SKO-DC01" command. SKO-DC01 is the name that I assigned to my server, you can type any name instead of that. Your server will be renamed after you restart it.

Now that you have configured your Computer Name and IP address, you can install Active Directory on Windows Server 2022 Using PowerShell.
Add AD-DS Role And Create a Domain Using PowerShell
To create a domain controller on Windows Server 2022, you have to install AD-DS (Active Directory Domain Services) role and DNS Server role, it is faster using PowerShell instead of Server Manager. When you installed AD-DS and DNS Server properly, then you can create a domain controller. Follow the steps below to add the AD-DS role and create a domain in Windows Server 2022.
1. Run PowerShell as administrator. Execute the Get-windowsFeature command in Windows PowerShell. Find the name of Active Directory Domain Services for PowerShell commands. In this Server it is AD-Domain-Services and it is available for installation.
2. Type Install-WindowsFeature -Name AD-Domain-Services -IncludeManagementTools command and hit Enter key.

3. Once the installation is finished, you have to import ADDS Deployment module manually by executing the command Import-Module ADDSDeployment. If this is the first domain controller, you must add a new forest by executing the command Install-ADDSForest. Type the Domain Name and DSRM password. Your domain name should be in this format (a name .lab, .com, or .anything you want). When you see a message that your server will be restarted, type Y to restart your server.
You might receive some warnings, but don’t worry the Active Directory Domain Services and DNS Server roles will install. When you receive an error that DNS Server is not installed properly, you can install DNS Server manually and then try again. Check this to know how to install DNS server using PowerShell.
Check this article to know more about the Active Directory.
