Delete WiFi Network Profile with Command in Windows 10?
Deleting a WiFi profile in Windows 10 has a long process. In this post, we will show you an easy way to forget Windows 10 WiFi network profile with command. Try to use the command line for managing Windows 10 to get expert on Windows PowerShell and command-line interface on Windows environment.
Delete WiFi Network Profile
When you join WiFi networks with your Laptop, the WiFi profile has saved on your computer. In a case for joining the WiFi network with the same name or changed WiFi password, you need to delete the current WiFi profile. Let’s do it first with the command line and finally with GUI.
To forget a WiFi Network on Windows 10 using GUI:
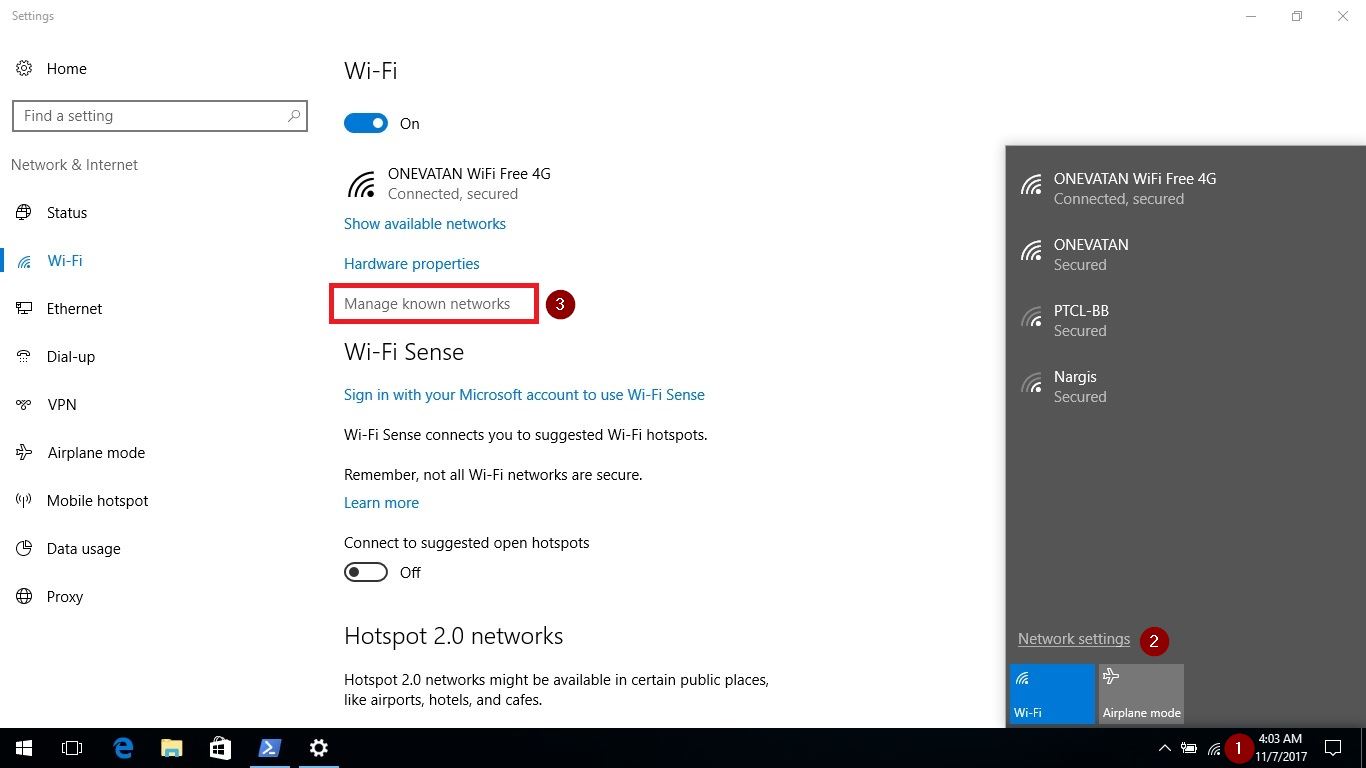
- Click the WiFi icon on the taskbar on the right side of the desktop screen.
- Click Network Settings.
- Then click Manage known networks.
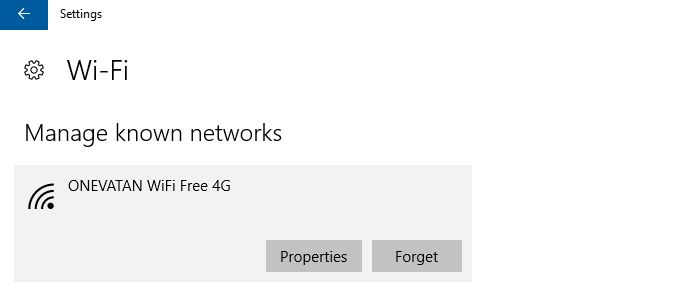
- On the Manage known networks, select a WiFi network profile and click Forget.
The screenshot shows the process you rich the Wireless network settings and forget Windows 10 saved WiFi network profile.

Note: You can find the Wireless network settings on Windows 10 by typing “WiFi” on Windows 10 search box. The Change Wi-Fi settings are the exact Wifi settings we need.
I don’t know why Microsoft removed the ability to delete Wi-Fi networks from the network list if the network isn’t in range. Manage Wireless Networks is also gone from the control panel. If you want to better manage Wi-Fi networks in Windows 10, you’ll need to head to the command line.

As the screenshot above shows, Windows 10 does have a “Forget this network” option, but it doesn’t appear in the network is not in range. To delete old profiles, you’ll need to use the netsh command-line utility.
To delete a Wifi network profile in Windows 10 press Windows+R keyboard button then types PowerShell to open Windows 10 PowerShell. You can use CMD as well.
Related article: How To Find WiFi Password On Windows 10?
1. To See Stored Wireless Profiles, type:
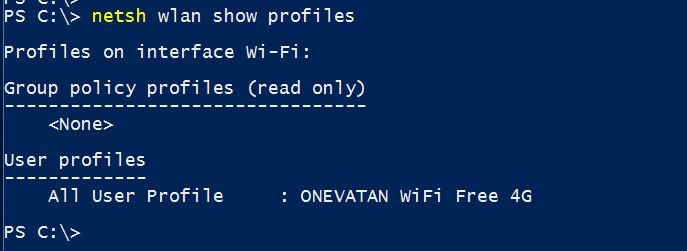
- Type “netsh WLAN show profiles” and press enter.

You see the two saved Wireless network profiles on my computer. It will show a list of saved profiles of your connected WLAN devices. Then you’ll need to know the profile name that you want to change.
2. To See the Stored Key (WPA/WEP/etc.) of a Specific Profile:
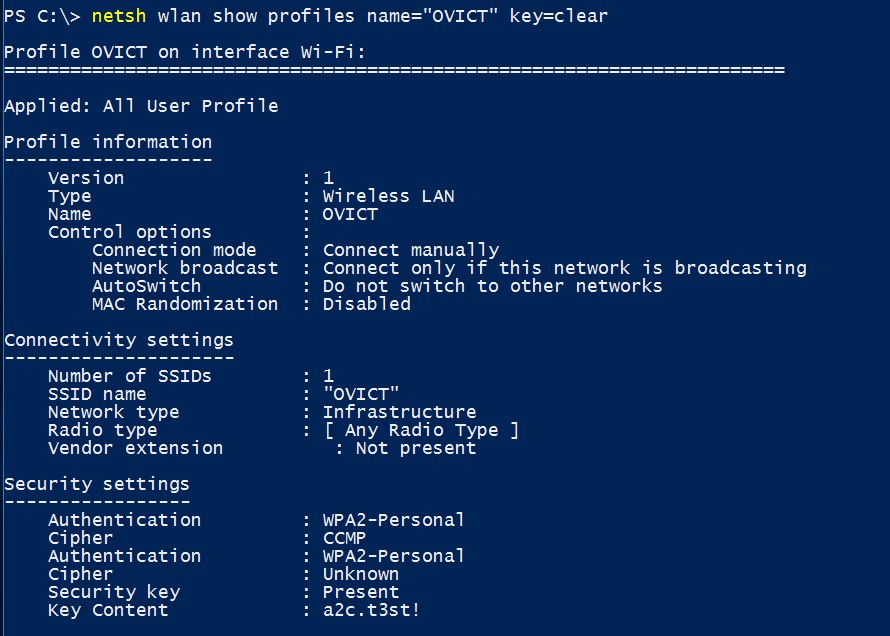
- Just type “netsh WLAN show profiles name=”OVICT” key=clear” and press enter.

That’s good; you’ll find the critical content under security settings. The next step is to delete a WiFi network on Windows 10 with the command line.
3. To Delete a WiFi network on Windows 10:
- Just type “netsh WLAN delete profile name=OVICT” then press enter.

Perfect, the saved WiFi network profile removed successfully. Now, try to check once again with “netsh WLAN show profiles” command to see if the Wifi network has removed.

More: 5 Steps To Secure Your Home Wireless Network
OK, the final step is connecting your computer to a new WiFi network. Now you can connect to a new WiFi network easily. And for fixing WiFi issue visite here: Fix WiFi Issue on Windows 10.

Thank you very much. This is very helpful.
Godfrey