Enable PowerShell Remoting in Windows 11
PowerShell offers a quick way to manage computers remotely through scripting and cmdlets. You can enable Windows PowerShell Remoting to manage multiple computers remotely in Windows 11 and other latest windows.
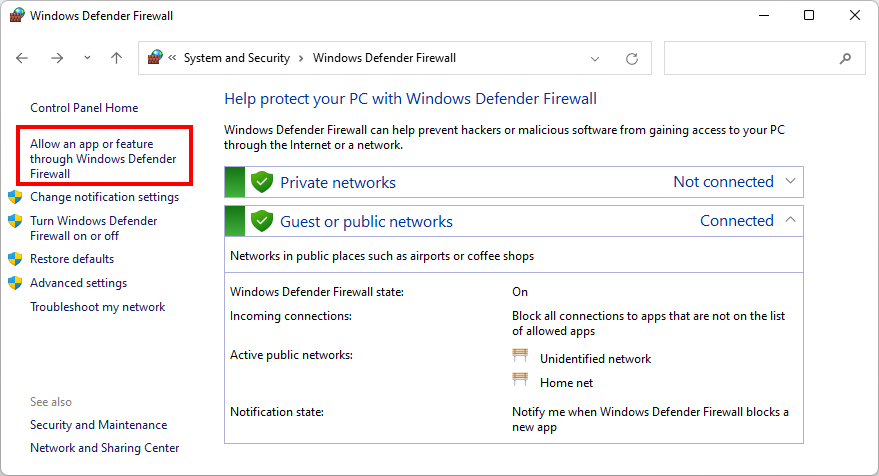
While setting up a remote connection between computers, Windows Firewall blocks the request to the remote computer, so you have to allow the firewall features related to remote management in the Windows Firewall. Go to Control Panel, System and Security, Windows Defender Firewall, and click on Allow an app or feature through Windows Defender Firewall.

In order to be able to set up PowerShell remoting in Windows 11, allow the following features in the Windows Defender Firewall.
- Remote Desktop
- Remote Assistance
- Remote Event Log Management
- Remote Event Monitor
- Remote Scheduled Tasks Management
- Remote Service Management
- Remote Shut-down
- Remote Volume Management
- Virtual Machine Monitoring
- Windows Firewall Remote Management
- Windows Management Instrumentation (WMI)
- Windows Remote Management
- Windows Remote Management (Compatibility)
It looks a long way and has a lot of things to configure. The quick way is to enable it through PowerShell. Open PowerShell as administrator and then type Enable-PSRemoting. If this command does not run successfully, then you have to allow the features mentioned above manually.
Sometimes you will receive an error message. If your computer’s network adapter is set up for a public network, then you have to change the connection type to private.
For more about PowerShell remoting, click here.
Change Network Profile Type Using PowerShell
To change the network profile type from public network to private network using PowerShell, follow the steps below.
- Run PowerShell as administrator.
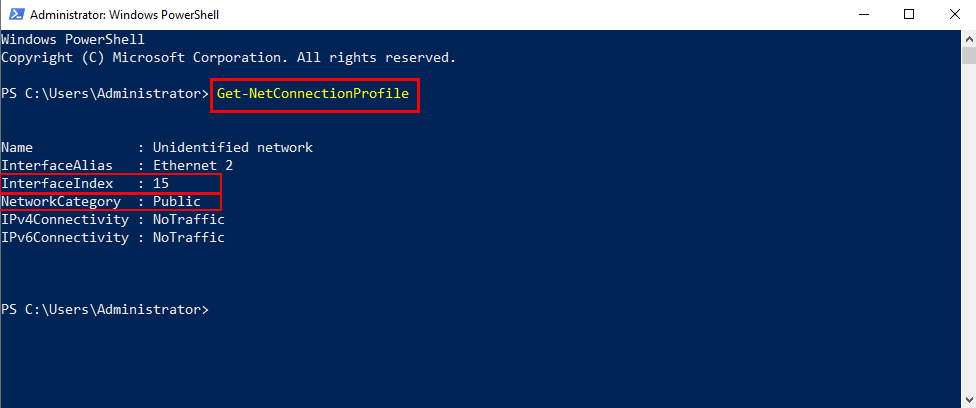
- In order to get the interface index number, type the command
Get-NetConnectionProfile. As you can see, my computer has one network connection which is Ethernet 2. The adapter connection type is Public, and InterfaceIndex is 15.

- Now that we got the interface-index number, execute the command
Set-NetConnectionProfile -InterfaceIndex 15 -NetworkCategory Privateto set Private network connection type for interface index 15. Note that the interface index on your device may not be 15, type the interface index of your device.
- When you type a command in PowerShell, and it runs without any error, then it means that the configuration is successful. To make sure that the Network type changed from Public to Private, type
Get-NetConnectionProfile -InterfaceIndex 15command.

Now that the connection type changed from public to private try to enable PowerShell remoting.
PowerShell is a great tool to configure windows settings locally or remotely because there is no Graphical User Interface (GUI) involved, and it runs the command quickly. Another advantage of PowerShell is that you can manage multiple remote computers at the same time, and run one command on multiple computers.

With a new router, I am trying to enter my WiFi WIRELESS password and also enter my WiFi NETWORK NAME.
I have looked and tried a dozen or more instructions on how to do so. I was unable to do so. All the instructions are for using an ethernet connection.
If TECHNIG can help me with my problem, I would appreciate it.
Regards,