How to Decrease Image Size with Photoshop?
You may have recognized while capturing an image with digital cameras, the size of an image looks too high, in order to decrease its size and have the same resolution. Here is a simple method to decrease Image Size in Photoshop without losing quality. Before this session you may have worked with different features of Photoshop but you have not worked with this feature of Photoshop. I have decided in this lesson of Photoshop Tips to take a tour of Scripts here inside Adobe Photoshop, So let’s get started.
Decrease Image Size in Photoshop
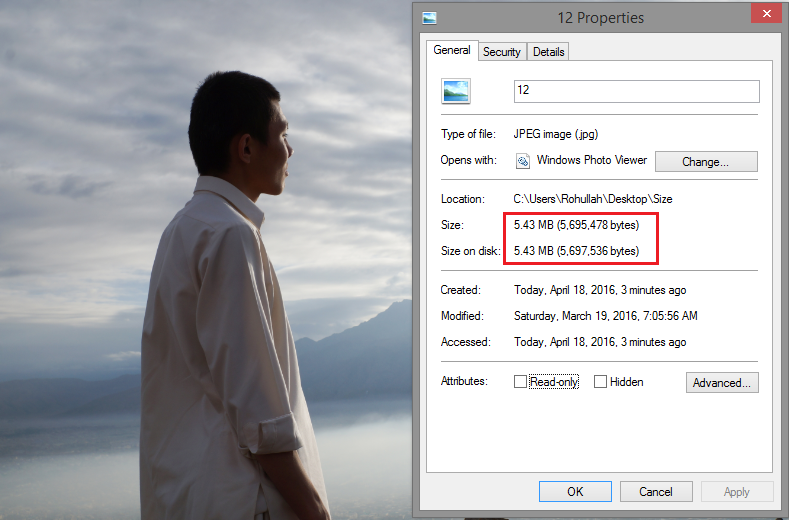
Before starting, take a look at size of this image which looks a bout 5.43 MB after decreasing its size it will look a bout 486 KB.

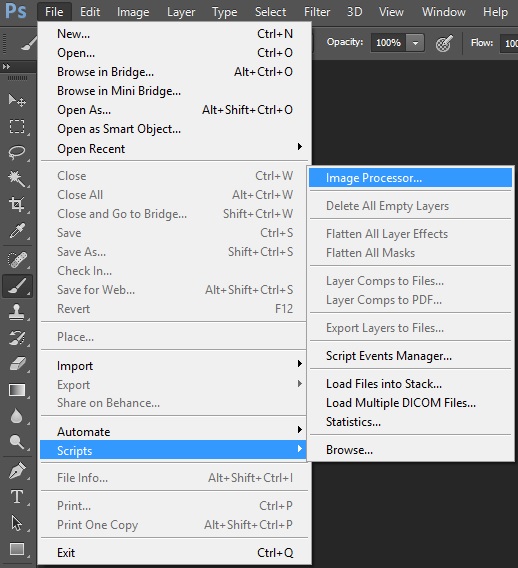
1. Create a new folder and then drag your images inside it, After that open Adobe Photoshop. When you reached to Photoshop Navigate to File- Script and then select Image Processor.

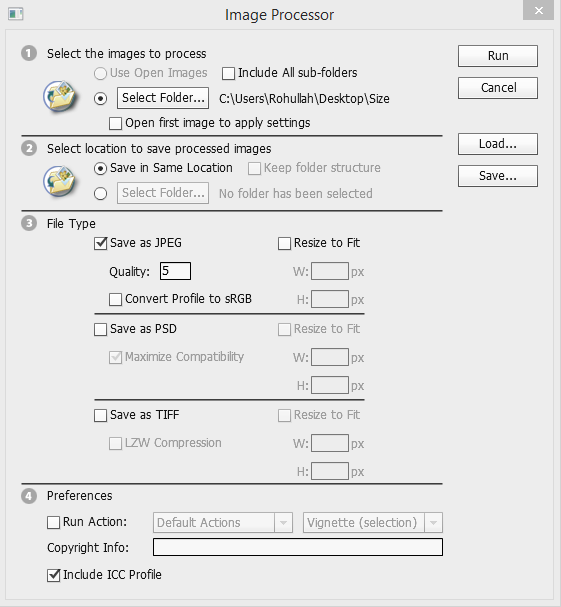
2. After selecting that Image Processor a new window will appear which is known as Image Processor, in this window select the folder which contains your files.

Learn more about Image Processor
You may recognized Image Processor panel is divided into 4 sections which has a number.
⦁ Select the images to process: In the first section you can select only an image, a folder which contains your files, you can also check the sub-folder, and at last you can open only the first image of the folder.
⦁ Select location to save Processed Images: Again you have three options in this section where you can save in the same location, a new folder and you can keep folder structure.
⦁ File Type: In this Panel you can save your image processor at which Format, but usually I use [Jpg] format. There is other options too like PSD, Tiff. There is also an option of re-sizing the image which you desire.
⦁ Preferences: in this panel you can also check the Run action, if you desire to apply any default actions of Photoshop then go ahead and then check the run action.
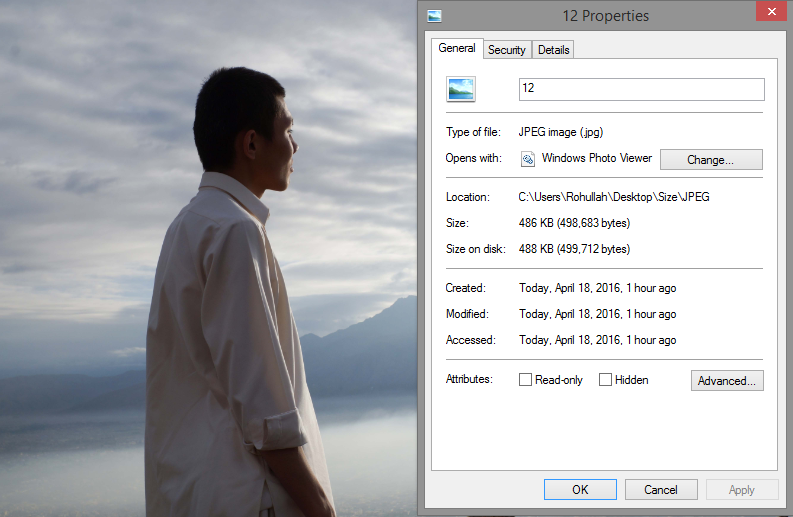
When your work is done click on Run to processor for you the result, automatically an image will open and automatically will close. I used default settings of Image Processor and here is the result of the image and its size is 486 KB.

I hope you have learned something from this exciting decrease image size with Photoshop without losing quality of images.
How to Decrease Image Size in Photoshop? – Video Tutorial
Feel free to ask your questions about my Photoshop tips and articles. Your feedback makes my articles better.

Thx for the article.
That’s great.
great.
Thank you all.