The Active Directory snapshots are a point-in-time view of Active Directory from Windows Server 2008, which are created by using the Volume Shadow Copy Service (VSS). In Windows Server 2012 R2 we are going to simply create Active Directory Snapshots using the Ntdsutil.exe command. It works the same on Windows Server 2012 and 2016.
How to Create Active Directory Snapshots?
In order to create active directory snapshots using ntdsutil command-line tool, you should open the cmd or PowerShell with domain admin privilege. So run the command prompt as administrators.
1. Run the PowerShell as Administrators and type “Ntdsutil” then press enter.

You can get the help by typing the “help” command or “?“. It is better to use the help guide when you don’t know the exact structure of the command.
2. Type the “Snapshot” command to enter the snapshot environment.

3. Try to set the specific AD LDS instance as the active instance by typing “Activate Instance ntds” and then press enter.

4. Type the List all to check whether the previews snapshots exist. Then create the active directory snapshots by the “Create” command. Type “Create” and press enter.

The snapshot was created successfully. Now try to mount and see the contents of the snapshot with active directory users and computers console.
How to Mount Active Directory Snapshots?
To mount an AD snapshot, use the “Mount” command and followed by the snapshot order number.
1. From the preview open PowerShell type “List all” to display the list of all snapshots. Then type “mount 2” and press enter to mount the snapshot with the order number of “2“.

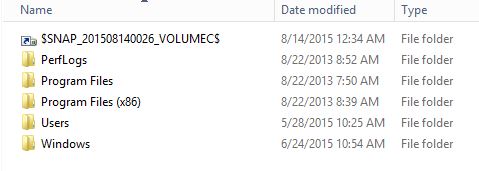
Then Snapshot mounted successfully on drive c:\$SNAP_********$\. Go to drive C and see the mounted snapshot.
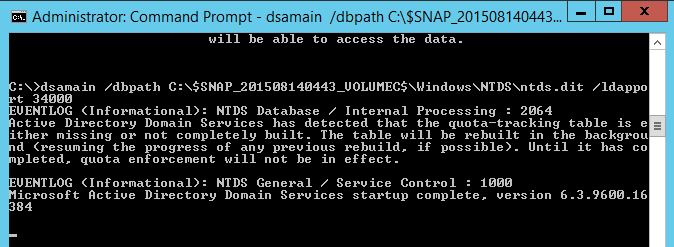
2. Try to connect to the mounted snapshot with the “Dsamain“ command.
dsamain –dbpath C:\$SNAP_201508140026_VOLUMEC$\ADDB\ntds.dit –ldapport 34000
Note: Currently the Dsamain command is not working with PowerShell, try to run it with Command Prompt.
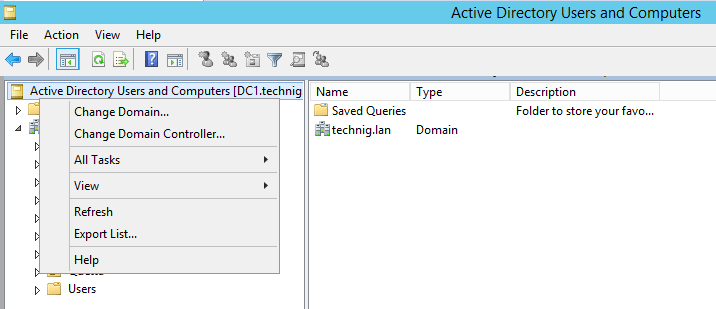
3. Now open the Active Directory Users and Computers with “dsa.msc” shortcut in Windows Run or open from Server Manager.
4. Right-click the Active Directory Users and Computers then click Change Domain Controller.
5. Select This Domain Controller or AD LDS instance and type the directory server name and port then hit enter and click OK to apply it.
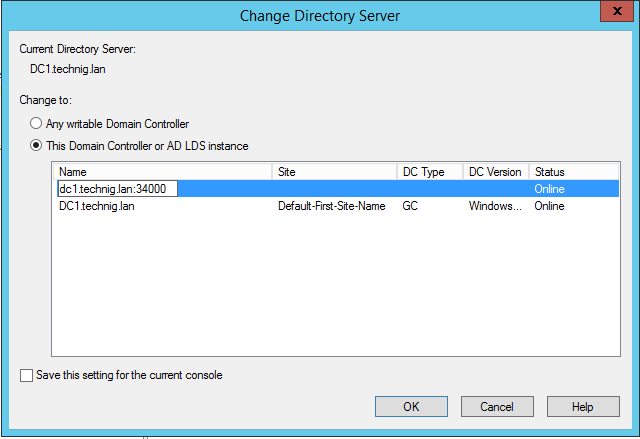
6. Finally, you can see and explore all contents of mounted active directory snapshots using AD DS.
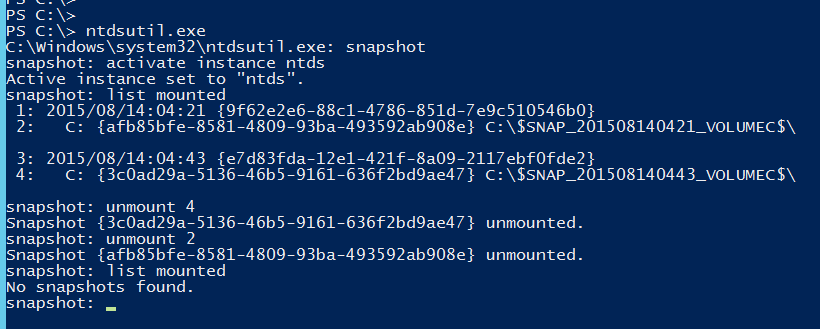
When you do the task with the mounted snapshot, at the end try to unmount it with the “unmount” command.
ntdsutil
snapshot
activate instance ntds
list all
unmount 4
unmount 2
list mounted
That’s all. Hope you learn something new about Windows Server 2012 R2.
Searches related to Active Directory snapshots
ad snapshot windows 2012.
active directory snapshot restore.
active directory snapshot location.
active directory snapshot tool.
active directory snapshot tool download.
dsamain mount snapshot.
schedule active directory snapshots.