How to Create Type Effect on Sign with Photoshop?
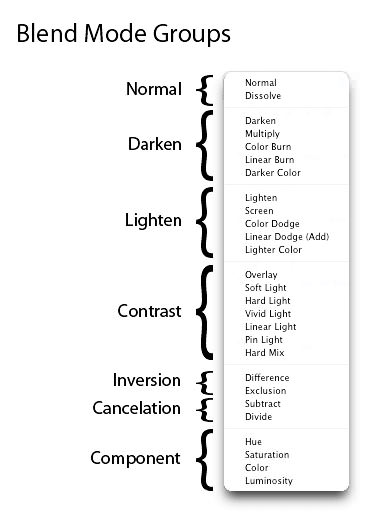
Designing with my Photoshop Articles. It’s time to create type effect sign for different purposes with different effects. Every effect has different usage in different projects, in this lesson I will be taking a tour of Blend Mode but not all of them only Dissolve, Mask with layer effects here inside Photoshop. If you have recognized blend Modes are divided into 7 parts of Normal, Darken, lighten, Contrast, Inversion, Cancellation and component. But before starting creating this project click here to download the needed files.

Create Type Effect Sign
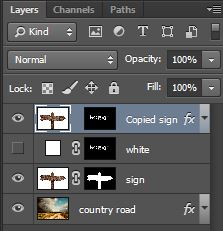
1. Go to exercise file and then open the PSD file. After opening you can delete or hide the sign layer. And then go to layer- New fill layer and then select solid color. Next in color picker window fill that with white color and then paint anything, after that press Ctrl+ I to inverse layer Mask.

Note: If you have recognized the edges are soft. In order to make them soft click on layer mask in layer panel to open properties and then give 4-pixel feather.
2. After that change the Blend Mode Form Normal to Dissolve, after changing the blend Mode, your result will be like screenshot.

3. Next we have to select the painted places, Press W to select Magic wand tool and then go to properties panel under the menu bar and then put amount of tolerance 0, uncheck Anti-Alias, Contiguous and check Sample all layers.

4. Go to sign layer, press Ctrl+ J to duplicate it, and then with selection selected drag the copied image to the top. Right click to layer mask thumbnail and then select Delete layer mask after that create a new layer mask in order to convert your selection into layer Mask.

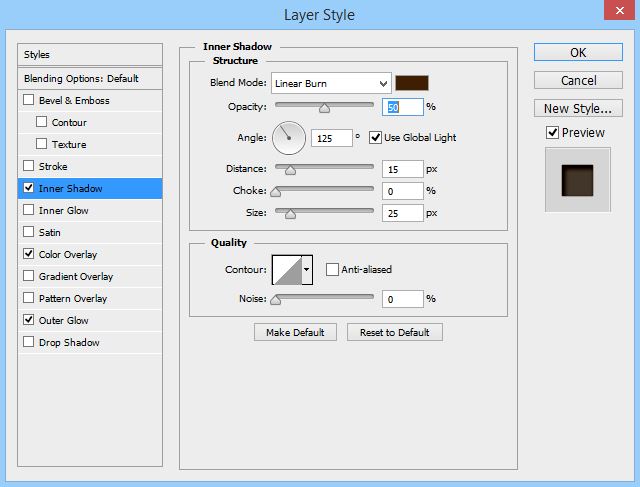
5. When you converted your layer into layer Mask it seems like nothing is there, it looks like it is Empty. In order to see them right click on the copied sign layer. First go to Inner Shadow and apply these settings. The code for Blend Mode is 402000.

6. Next go to color overly and again type the same code which we typed in Inner shadow. Check Blend Mode to overly with 50% opacity.
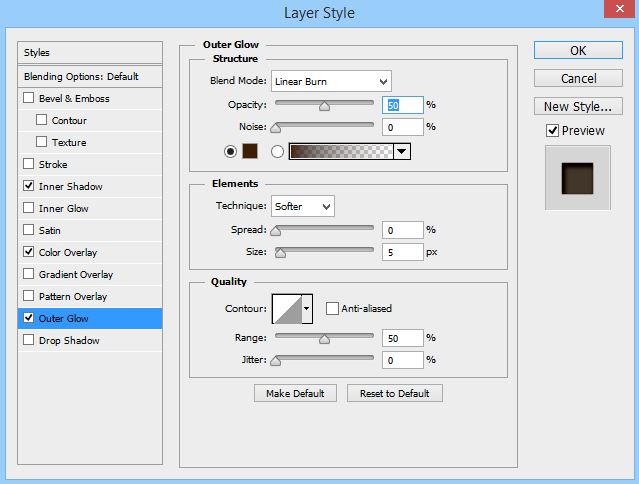
7. Next go to Outer Glow and apply these settings, don’t forgot to type the same code which we used step 5 and step 6.

8. After clicking ok you project is created but again if you want your text look more attractive go to layer panel, this time select copy sign layer not the layer mask thumbnail and then press up or down arrow key to position the image and at last you project will look like this.

I hope you have learned something from this text design in Photoshop, and your feedback will make my projects better.
