How to Create Realistic Design in Photoshop?
In this lesson you will learn to create realistic design in Photoshop from Superhero shield. Also there I will introduce you with some new advanced tools of Photoshop like Blend IF, since I have divided this project into four parts for learning better and in any of which was needed I explained in Quick tips with some words but before starting click here to download the needed files for training.
Create Realistic Design in Photoshop
Let’s begin to create realistic design in Photoshop. It’s a long article, so try to read and apply carefully to design or create realistic design in Photoshop. Bringing some changes will make you project better.
Step 1. Creating Basic Editings
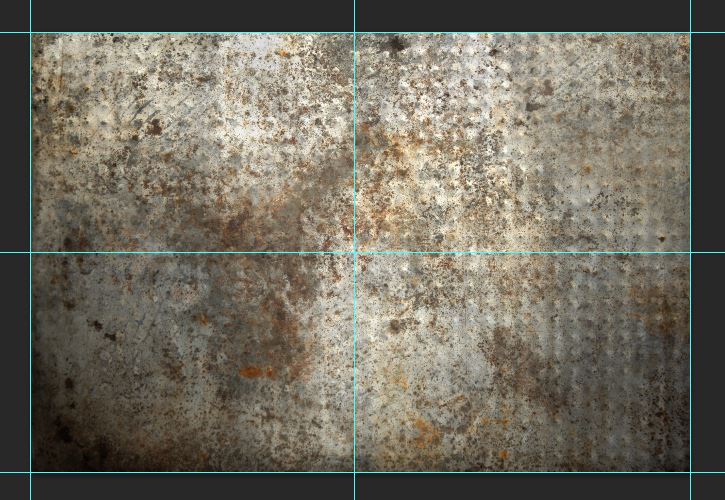
1. Press Ctrl+ O to open, open dialog Box and then open the Grunge Background in Photoshop. In order to work with our project perfectly I will go ahead and create some guide line layout by navigating to View and then select New Guide layout and create these type of Guide line like screenshot.
Note: If you are using Adobe Photoshop cc 2015 then you will have New Guide Layout there, put their amount 2 rows and 2 columns, but If you are not using Adobe Photoshop cc 2015, Go to view select New Guide and put the amount for Horizontal 6.985 cm, this will draw for you a ruler in middle of Grunge Background by Horizontal, for other two rulers in Horizontal Open Ruler by pressing Ctrl+ R and then press V to select Pick tool and draw two rulers like screenshot to the sides. Also for drawing Vertical Rulers in both sides do the same thing but for middle the again go to View and then select New Guide Line and put the amount 10.48 cm to draw ruler in the middle of your Grunge Background.
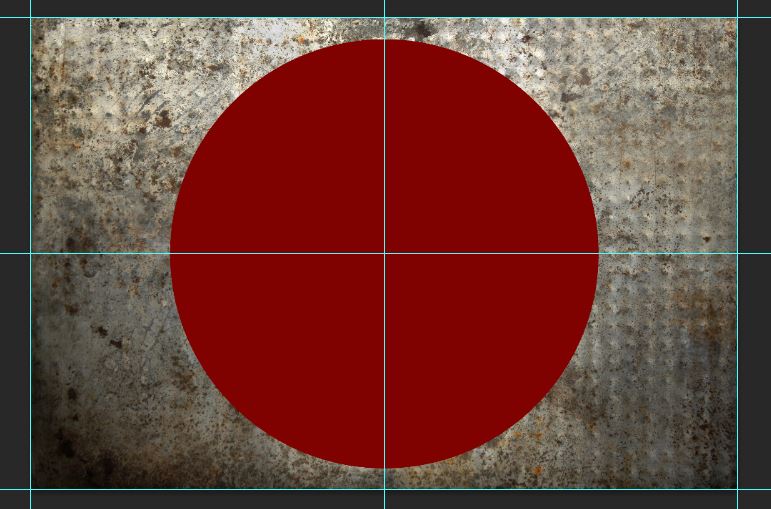
2. Let’s create a circle shape from middle of the ruler, by selecting Ellipse tool from tools section. Then go to window menu check the color panel, click on its corner to open options of color and then select HSB {Hue saturation Brightness} and dial put the amount to 0 for Hue, 100 for Saturation and 50 for Brightness. And then go properties of shape layer select shape not Path. And then press Alt+ Shift on the keyboard to draw a circle from middle of Rulers. After realizing your mouse Photoshop will automatically create a vector base shape layer.
Note: Remember to draw to the circle with 1200 width pixels and also 1200 height pixels and rename it Red 2.
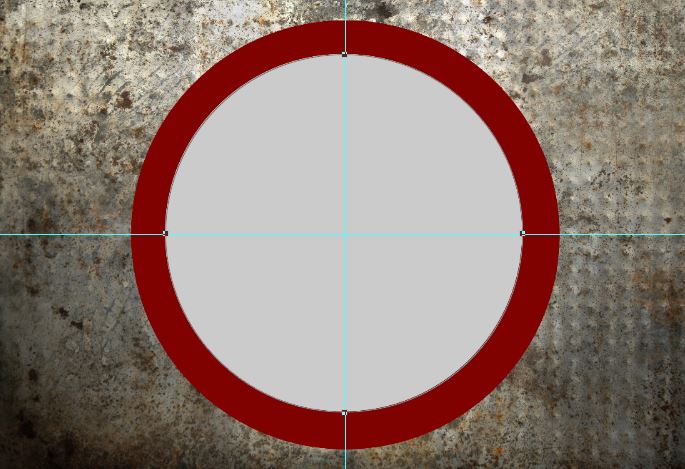
3. This time instead of dragging Just left click once and a new window will open, put their amount 1000 pixels for both width and height. After drawing go to layer panel click on the shape to open color dialog box and then type the code CCCCCC for second vector base shape, and then rename it White.
4. For creating next two shapes you can draw them or you can copy this two shapes, but there is a new trick by which you can transform and copy.
First press V to select Pick tool and click out of the part Anchor Points, and then press Ctrl + Alt+ T and this command will open for you Reference Panel in properties and apply these settings like screenshot, after clicking ok it will automatically create and copy your shape, again for changing the color go to layer panel and click on the shape to open color panel and then type 800000 code. After changing its color change its name to Red 1.
Note: For the third shape put its amount 800 Pixels by width and height with cccccc color and for forth shape put its width and height 600 pixels with 005580.
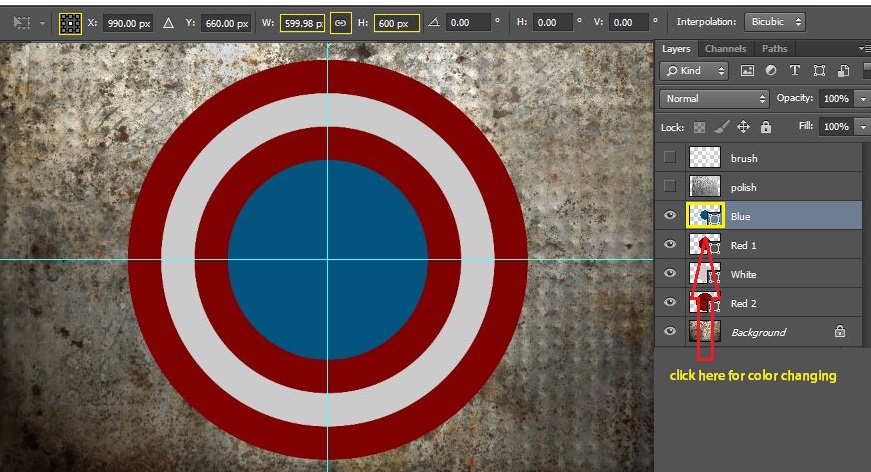
Quick Tip: In order to create this part so soon, draw some Guides from View Menu, and then draw an ellipse circle with 800000 color code, and then Press Ctrl+ Alt + T in order to copy and paste at once.
Step 2. Creating Star Inside Superhero ‘s Shield
In order to create Star inside the shield Press Ctrl+ R to open ruler and then draw a line like screenshot. After that go to shapes and this time select polygon Tool, after that go to properties of Polygon tool and then go to gird Icon, check the star. By Pressing Alt on the keyboard you can drag your corner star to any direction which you want, after creating them change the color to cccccc.
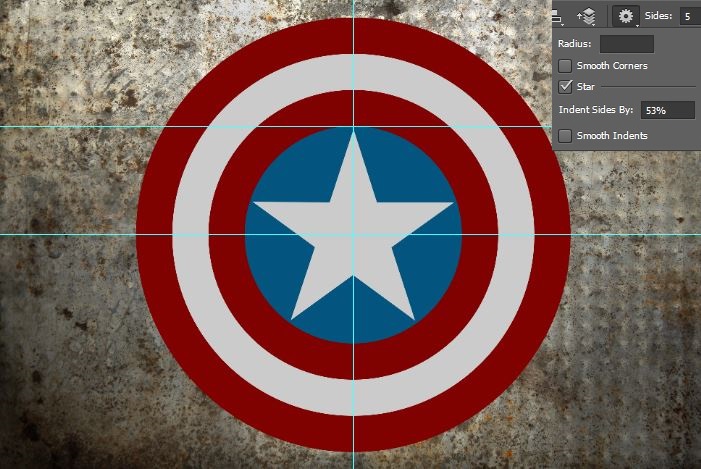
Quick Tip: Select Polygon tool and then check the star from Properties Panel and draw a star.
Step 3. Giving Style to the Shield
In order to give style in our shield in am using layer effects. For Creating these effects, I will start form star, in order to work in smart object, go to Layer and then select Smart Objects- Edit contents. After selecting that it will ask from you that it will open a PSB file. After reaching to PSB file Right click on the star layer and then select Bevel and Emboss, form its style select Pillow Style, this will give line like stroke inside star.
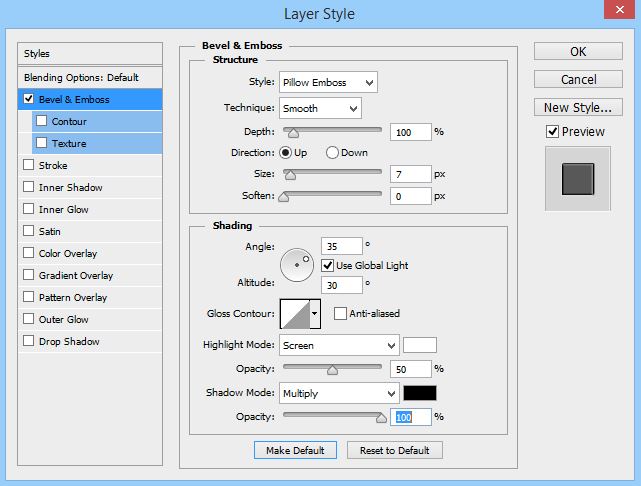
Go to layer panel, right click on the star layer, select copy layer style and paste it to all other vector shapes layers, to look more attractive like screenshot.
Note: After this step we don’t need any more to Guide lines, you can clear them by navigating to View- Clear Guide lines.
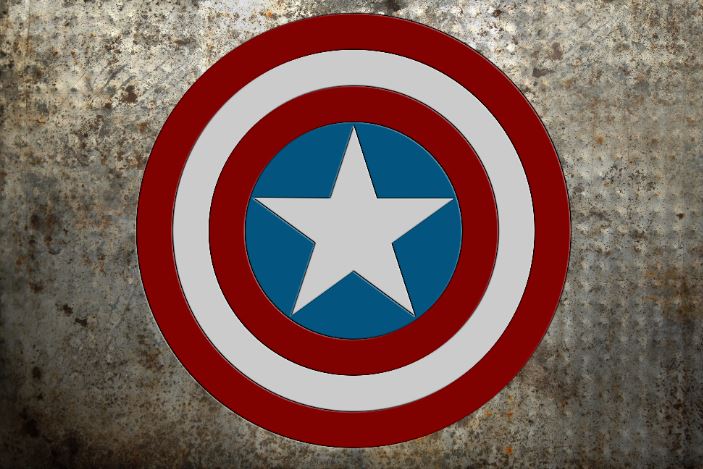
If you have recognized the last Shape which is Red 2 layer it has some light to outside, in order to remove them go to red 2 layer in layer panel, open blending options and change the style form Pillow Emboss to Inner Bevel.
After this step I will reinforce the shadow to look more attractive and I will start it by going to Blend Mode Star layer. When you reached to Blend Mode go to Inner shadow and apply these settings like screenshot.
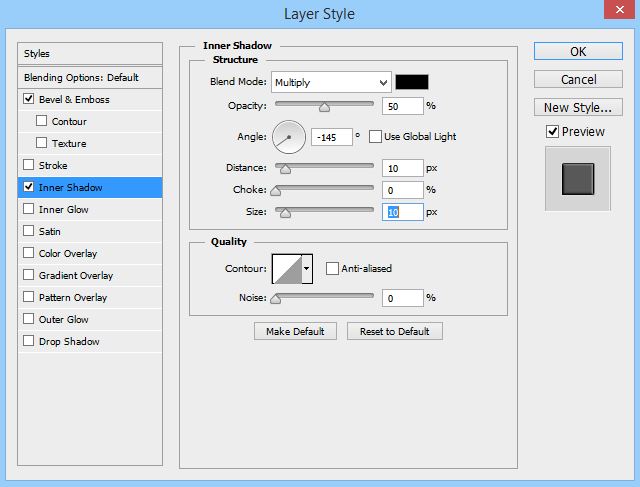
When you applied these settings to the star layer, copy these effects to the white layer to give also extra shadow edge. The reason why I am doing these the white layers because they are the one which makes the look more attractive.
This time I will go ahead to Red 1, right click and then select Blending Options, this time Drop Shadow and apply these settings like screenshot.
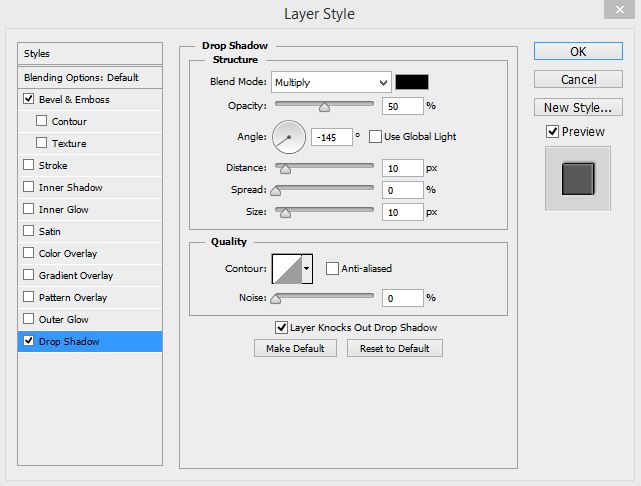
After applying all the above settings select all the layers in layer panel and then convert them into Smart object, and rename it Shield. After this we will start working on group for all layers of shield together by reaching to Drop shadow of Blend Mode and apply the same settings.
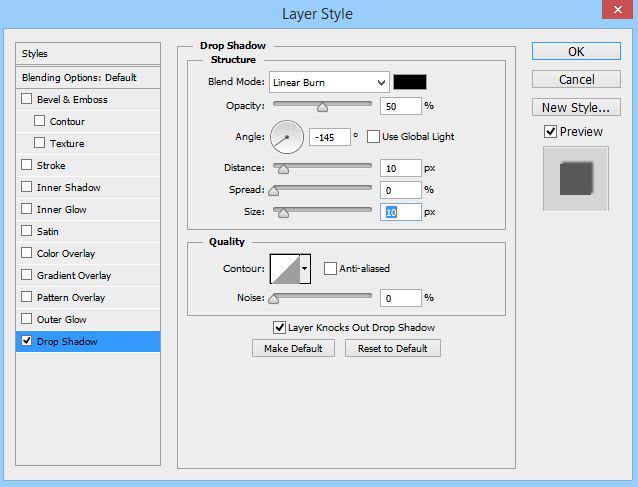
In order to create a nice and shiny light on the Shield, go to Blend Mode and this select Gradient and apply these settings like Screenshot, the code for Gradient Editor is 002040 and FFFFff. After Creating them take your light up to the one corner which I circled in the Image.
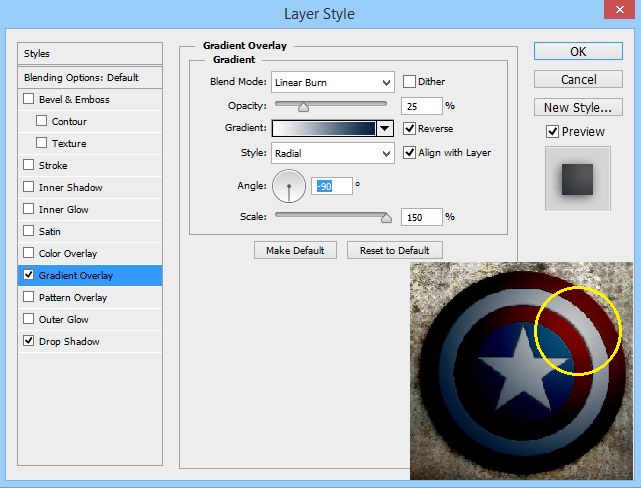
Note: The above Screenshot which I Circled is the result Image, I have increased its opacity for you to show where to position the gradient light. After this step I will go ahead and defocus the Shield by navigating to Filter- Blur and then select Gaussian Blur, For the first time put its amount to 2 pixels but for second put its amount to 10 pixels.
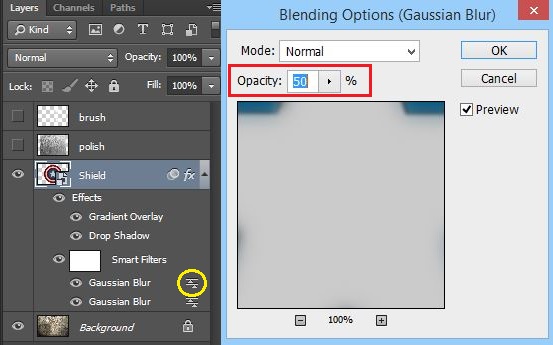
Note: After applying Gaussian Blur it will defocus your Shield but I don’t want to Blur This Much. In order to decrease the second Gaussian Blur, go to layer Panel Expend the Effects and then delete the Smart Filter by right clicking and then select delete Smart filter but for decreasing opacity, click on the line with tringle, and put its amount to 50 percent.
Let’s create the texture on the shield, I have put this one on the exercise files as Polish which you can see in Layer panel, I will go ahead and active this layer. For the first step convert it to smart object by navigating to layer Menu and then select Smart Objects-convert to smart object. After that go to Edit Menu- select Transform and form options select Warp.
This go to Properties under the menu Bar and then change the shape from custom to Inflate, and put the Blend up to 100%, then click on switch button to bring into standard mode of editing and this time apply these settings like screenshot.
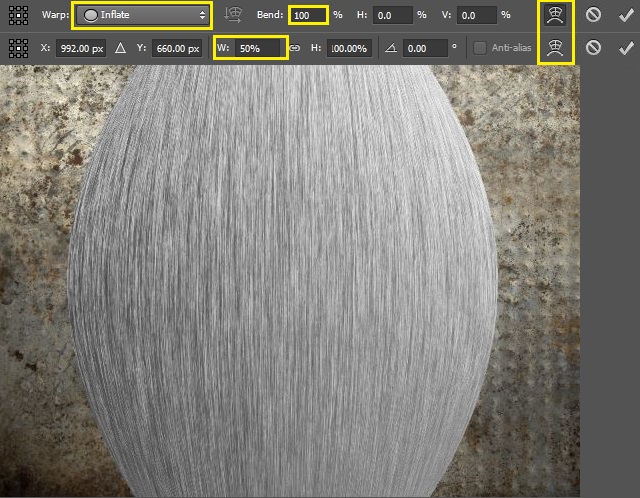
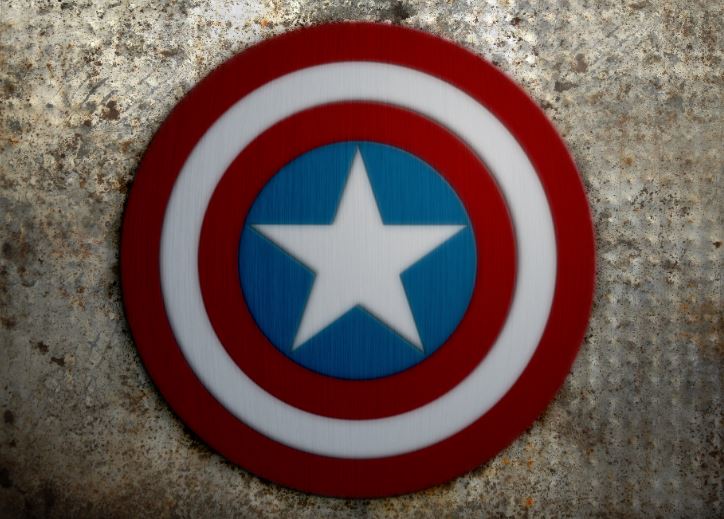
After applying them press Enter on the keyboard and then go to layer menu– select Create Clipping Mask and then change its blend Mode from normal to Soft light with 33% opacity in layer panel to give you the Result like screenshot.
Step 4. Giving Lights to the Shield
Mostly for creating lights in every Project we almost use Adjustments, Color Masking with Redial Gradient and many other tips. So let’s get started creating this part of the Project by reaching to the Window Menu and then check the Adjustments. Mostly we have used Adjustments form layer Panel and layer menu but in this I will be using in different method and different tips with shortcut.
After checking Adjustments, press Alt on the keyboard and then click on the last Icon to open Vibrance Adjustment layer, and after pressing that name that Vivid and then Press Shift + Enter to highlight to vibrance and put the Vibrance Value to 100 and then press Tab on the keyboard to highlight or move up to saturation, put its amount 10.
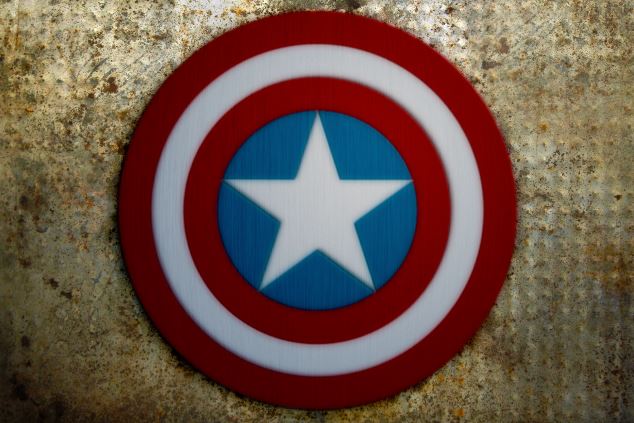
This time again go to Adjustments Panel and again press Alt on the keyboard and click to Brightness/Contrast, after clicking again you will face the same window like Vibrance and Rename It Darken, again press Shift + Enter on the keyboard highlight the Brightness and put its value to -33 and 100 for Contrast.
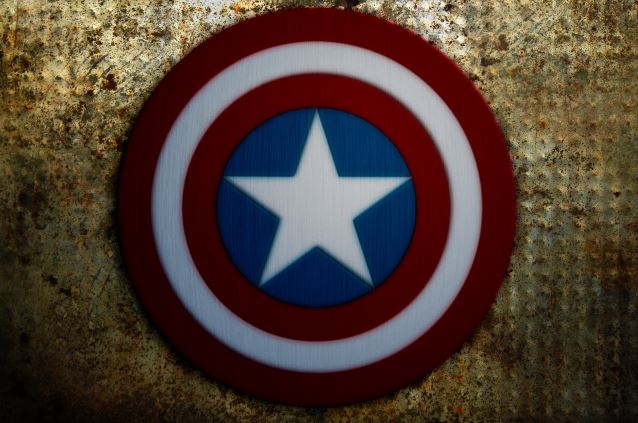
Till this step the scene is looking too dark and we are going to light it by Lens Flare. In order to do this, go to Layer Panel and then select the Polish Layer, create a new layer by pressing Ctrl+ Shift+ N above the Polish layer also rename it flare and fill it with black color also change its blend mode to screen. Right click on the flare layer and then select convert to smart Object. After that go to Filter Menu- Render and then select Lens Flare.
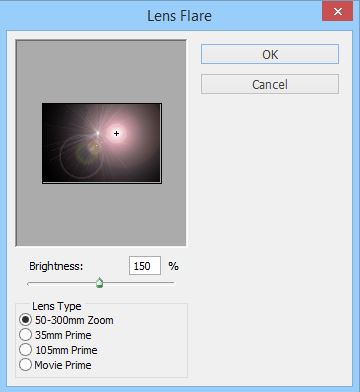
If you had problem with positioning the lens flare with the shield, you can go to layer panel expend the effects and then double click on the lens Flare to open again the lens Flare and reposition it, also delete the Smart filter form layer. This time right click on the Flare layer select Blending options and then select Color overly, put it color to 808080 which is Gray Color and change its Blend Mode to Saturation. But If you recognized the hole Project will turn into Gray color but I want to fill only the Flare Layer, in order to do this, click on the Blending Options and then check Blend Interior Effect and then take the Blend IF underlying Layer to 100 and then press Alt and click {Alt will separate the Blend if}, and drag it to 0 and this click will give you smooth Transition from texture.
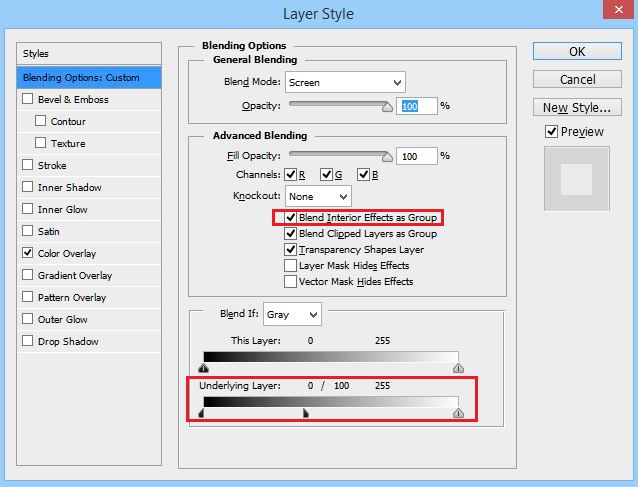
Note: Blend If effects are one the most Advanced Effect in Photoshop, I will to create more Projects about Blend If to learn more.
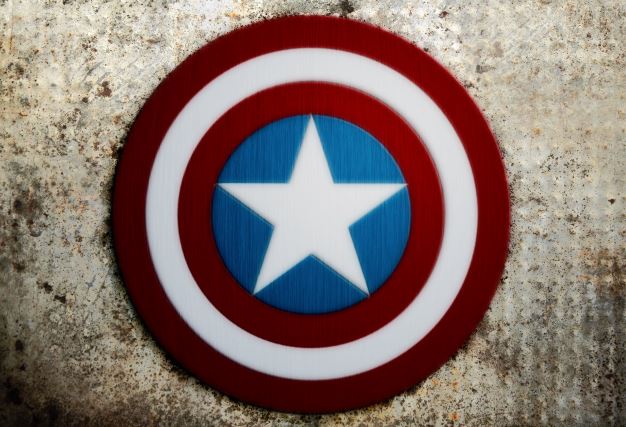
Next go ahead and enable the Bush which I created and saved for you in Exercising Files, you can create this Brush with Hardness of 0 and size of 300 pixels. When you Enabled the Brush, decrease its Fill up to 60% from layer panel under the opacity, also change its Blend Mode Form Normal to Linear Dodge(Add).
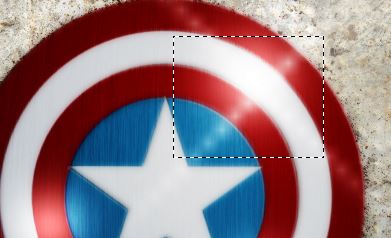
Press Ctrl+ Shift + N to create a new layer and rename it Splash then press B to select Brush from tools section. After that right to anywhere in the interface and complete Brush section will appear, go ahead and click on the settings and then select Assorted Brushes, and find their Crosshatch 1, by default its size is 25 Pixels, simply you can call it Brush number 25. When select this Brush increase its size up to 1000 pixels and draw once by one clicking to screenshot Position.
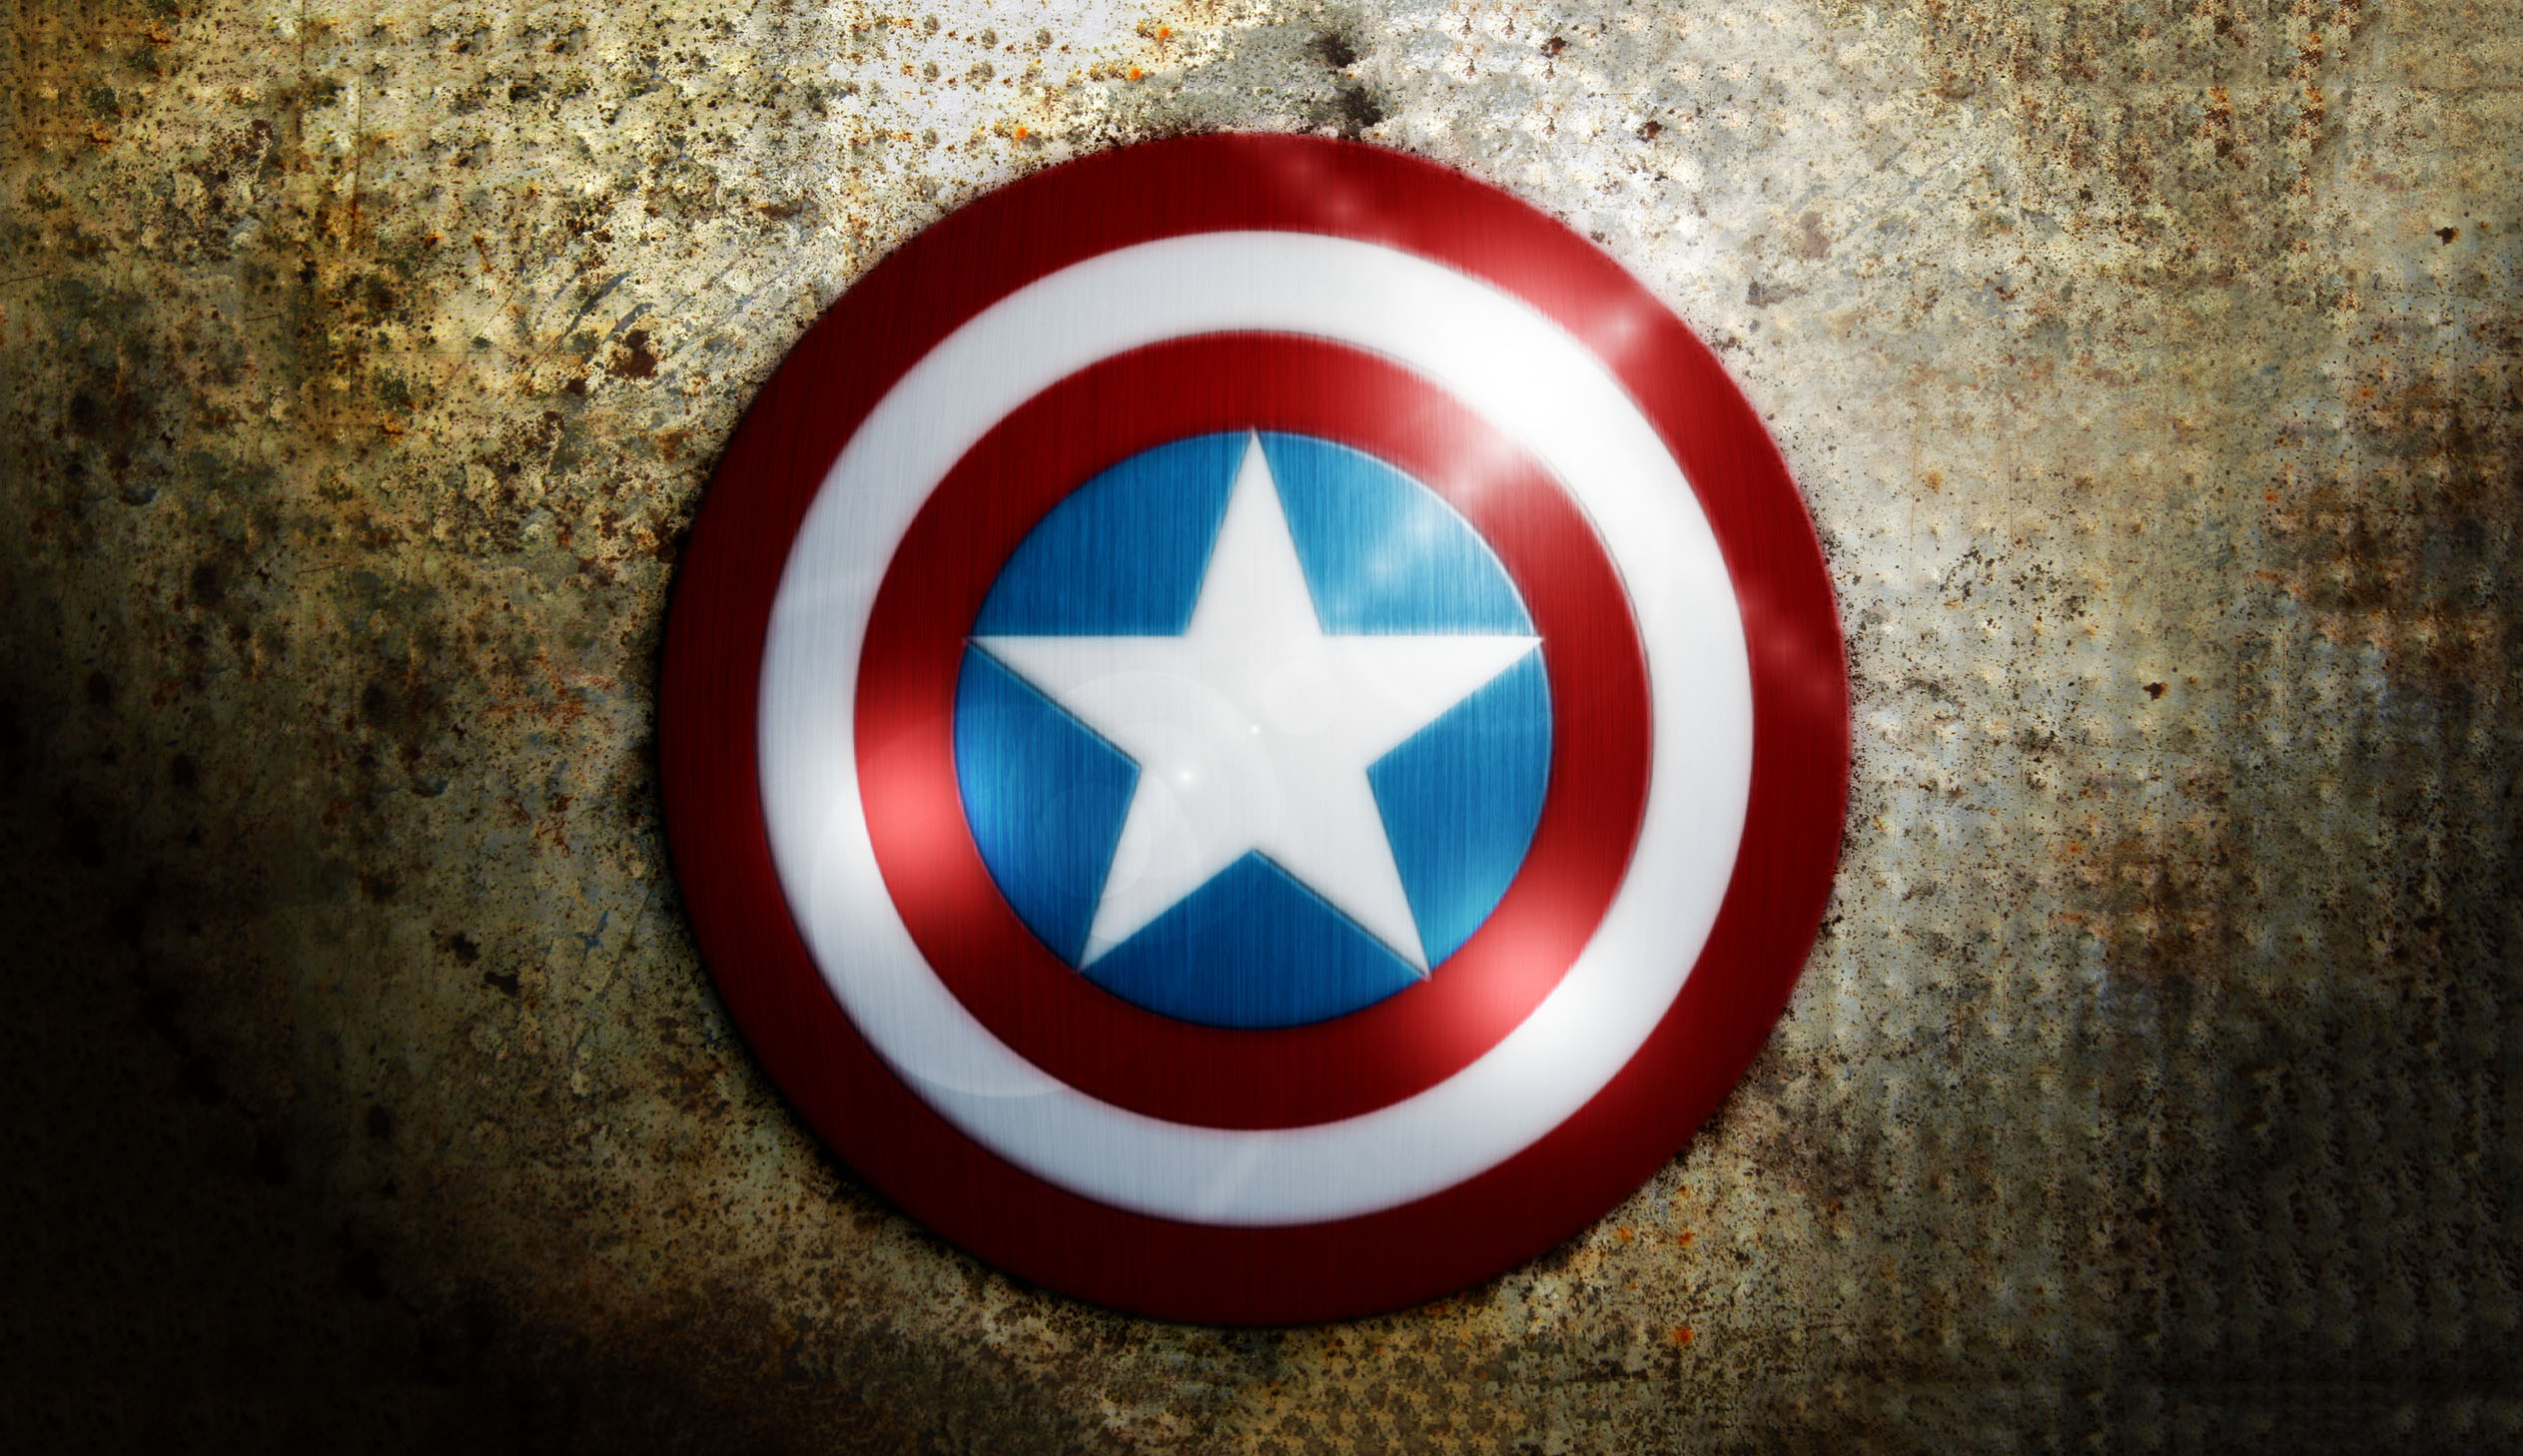
And I hope you have learned something from create realistic design in Photoshop tips but again if you had any question, give your feedback and I will be there for you.

thankful for this article dear ghulam abbas