How to Create Metal Text in Photoshop?
Related to Photoshop Tips articles, I have wrote this to show you how to create metal text in Photoshop. In this nugget we will be working with some advanced features and options of Photoshop. For creating this article I going to create metal text effect Photoshop. Also we will learn something new about channel, Filter menu lighting effect and Clipping Mask.
How to Create Metal Text in Photoshop?
1. Press ctrl+N for creating new document with 800 widths and 400 height pixel. After creating the document press T or go to Shape section of tools and then select type tool.
Note: You can select any font by your own desire. I have selected Bernard MT Condensed Font. After selecting type tool change its color code to 000000 which is black and type anything you want.

2. After typing Teching we need to rasterize our layer. We can rasterize our layer into two ways:
- A: Right click on the layer in layer panel and then select rasterize type.
- B: Go to Layer in menu bar select rasterize- type.
3. Here we need to load selection. In order to do this, press Ctrl on the keyboard and left click on the Technig layer. After this go to channel panel, if it is not enabled, go to window menu- check channel.
Here we need to create a new channel in channel Panel by clicking on the Icon in channel panel.
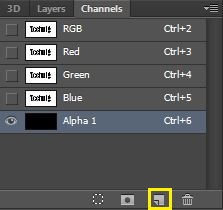
4. After you create a new channel, your preview will change into selection and your background will be black.

5. I need to change it’s color into white by pressing Ctrl+Backspace, and press Ctrl+D to Deselect the selection.
Note: Press D on the keyboard to select Default colors in foreground and background then press Ctrl+Backspace.
6. After applying them go to Filter – Blur – Gaussian Blur and put it’s amount to 5 pixels.
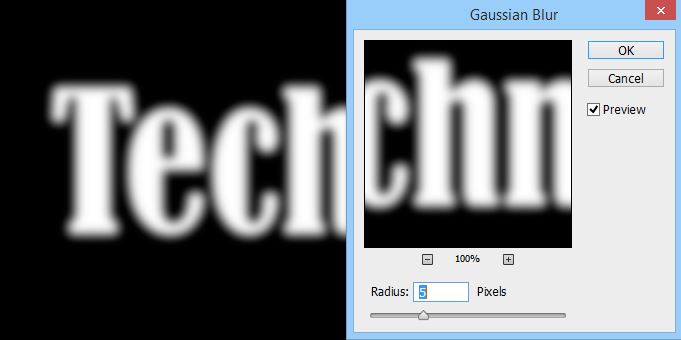
7. Till this step our work is finished with channel panel, instead go to Layer panel.
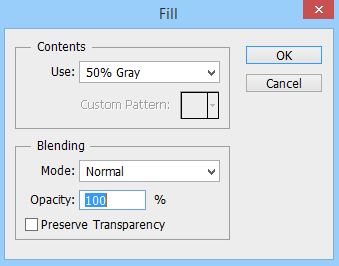
8. After reaching into layer, press Ctrl+Shift+N to create a new layer. And then press Shift+F5 or you can reach by navigating Edit Menu-Fill to open Fill dialog box, select 50% gray and click OK. Your background will be change to Gray color.
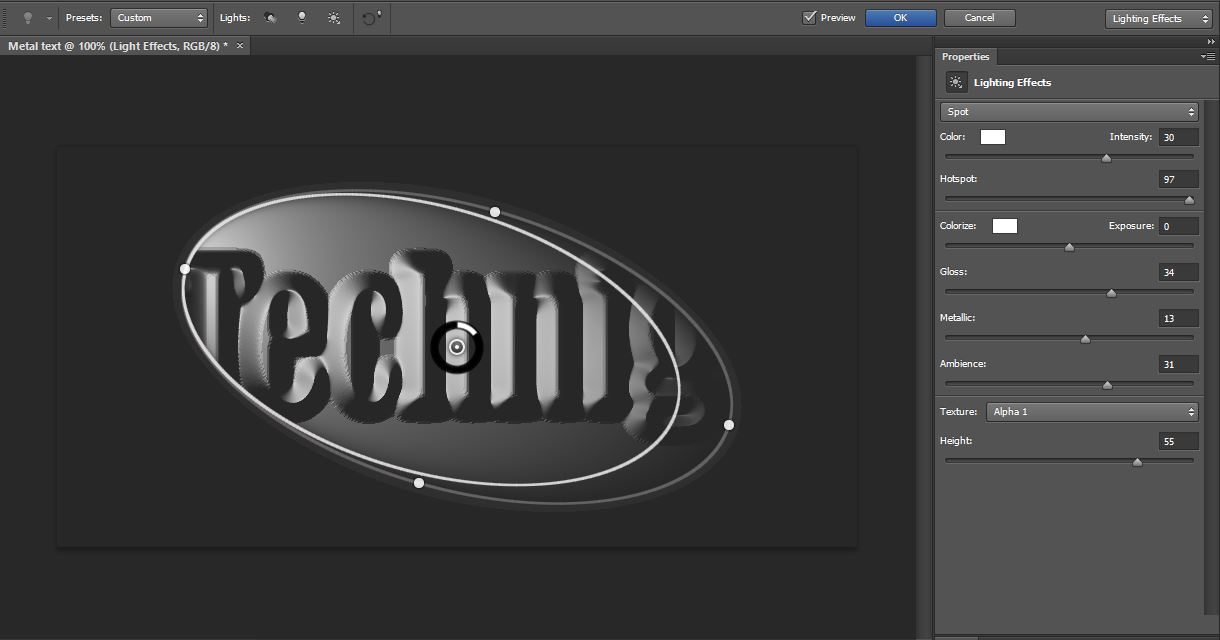
9. Go to Filter – Render – Lighting Effect and apply these settings.
10. Go to Layer and select create clipping Mask and your result will be like below screenshot.

Also If you want more lighting effects and more editing in your project you can apply them by navigating Image Menu – Adjustments and apply any effect which you want, just like this Image.

Note: If you make this project in previous versions of Photoshop It will look more attractive. Since Adobe has merged lighting effects with 3D one of it’s important role has been dismissed.
But again If anyone wants to create this project in previous versions, they can give their feedback, and I will here for helping you to create metal text in Photoshop. I hope you have created your own name with this designing article inside Photoshop.
