How to Create Animated 3D Video in Photoshop?
On the last two parts of Photoshop tips articles, we talk and taught how to create video using image sequence or editing video clips in Photoshop using Timeline. But in this part we are going to show you how to create animated 3D video using Photoshop. So find the preview Photoshop tips article from the below links.
- How to Create Video/Gif in Photoshop? This about creating video using image sequence.
- How to Edit Video Clips using Photoshop? It’s about editing video or clips in Photoshop.
But in this nugget we will learn a different tricks of timeline which is known as creating 3D video animation in Photoshop. Only one other effect of timeline will remains and I will introduce you that in coming step by step guides to Photoshop tips and tricks.
Create Animated 3D Video using Photoshop
In order to work with 3D capability of Photoshop, your computer must have a 3D card, otherwise it will not work and don’t wast your time on non compatible 3D card system. So just like last nugget we will create animated 3D video using Photoshop with timeline feature.
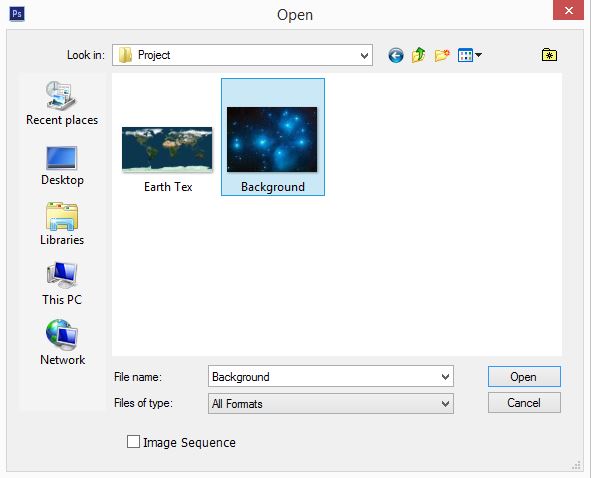
1. On your opened Photoshop, press Ctrl+O to open file explorer dialog box. Select a background image.
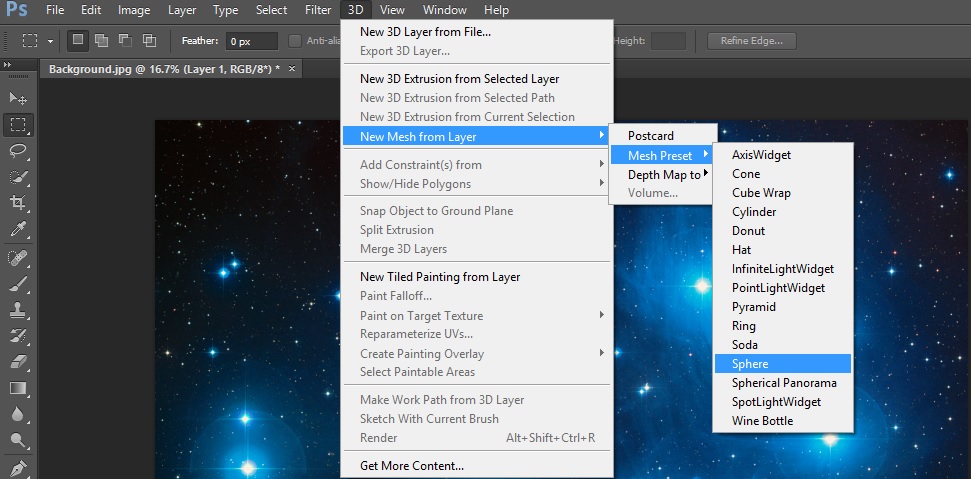
2. Create a new layer and then go to 3D Menu – New Mesh from layer – Mash preset – Sphere. Do like below screenshot.
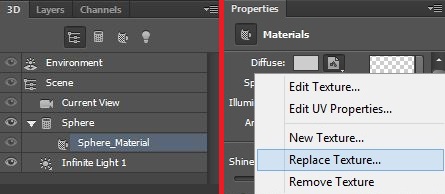
3. In 3D Panel select Sphere Material and then in Properties of Sphere Material select Diffuse – Replace Texture.
4. After clicking on Diffuse – Replace Texture a new window will open, which is known as open dialog box select map image. After replacing, your Sphere Material will be feel with map.
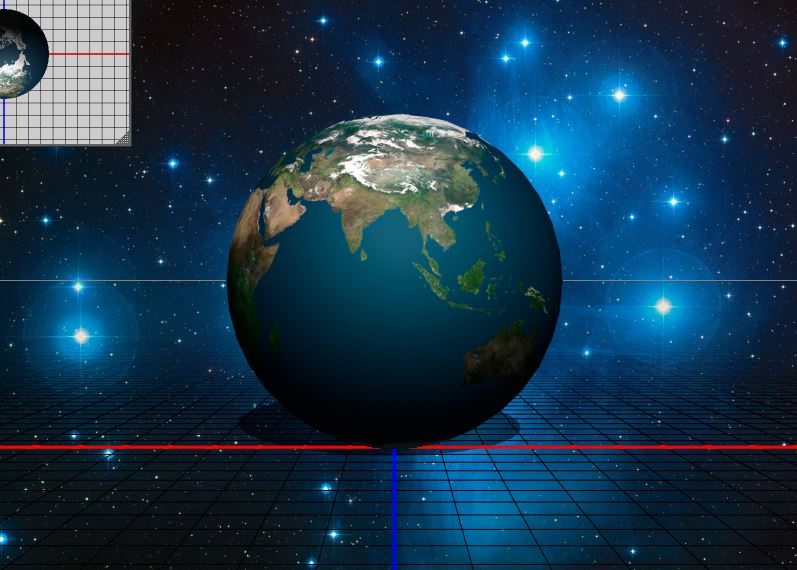
5. For creating more texture on your image to look better fallow this steps.
- A: In 3D panel select Sphere Material. B: Go to its Properties click on folder in front of Bump –Load texture, again open dialog box will be open then select map image. and finally change amount of Bump from 10 to 30%.
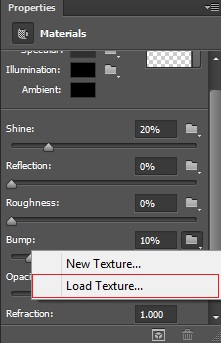
6. After loading Texture your project will looks like below screenshot.
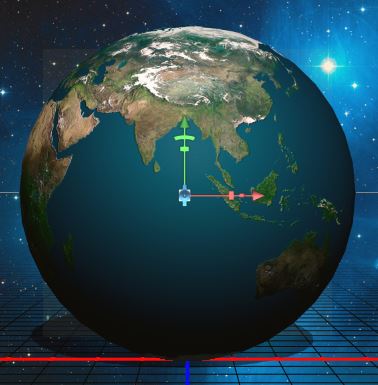
7. For looking natural, we need to take out or erase shadow. Go to 3D panel, select Infinite light and change its angle like this image to delete shadow.
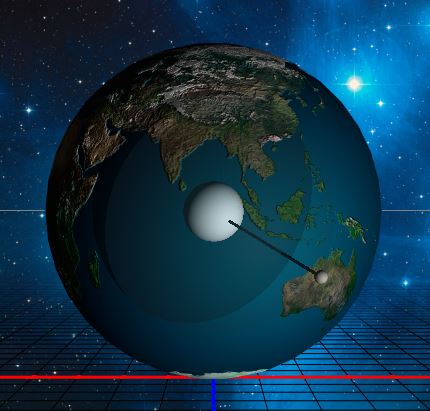
8. So it is time to create an animation into our 3D model. Simply go to Window Menu – Timeline. Select Create Video Timeline, if it isn’t showing, click on Tringle and select video Timeline.

9. After selecting Video Timeline you will take to the window of editing in timeline. This time we will not apply those settings which we used in two last nuggets. So simply expand tringle in timeline to see stopwatches.
Those who worked with After Effects and Premiere, Stopwatches are like them for editing.

10. In this part I will not use complete Stopwatches because our nugget will be too long, but remember for creating video or photo animation we use Stopwatches.
So I just use the fourth one which is 3D Scene position. First I will take play button into first frame and check the button of stopwatch which has yellow color.

11. In 3D panel select sphere, after checking Stopwatch of 3D Scene, take your play button in middle of your clip and then go to Properties, then change Rotate to –180 and for last frame change Rotate to -360.

12. So on the last step we need to render our 3D animation as video by navigating File – Export –Render video. Use any settings you want to render your video, but mostly the common formats are HD and Full HD.
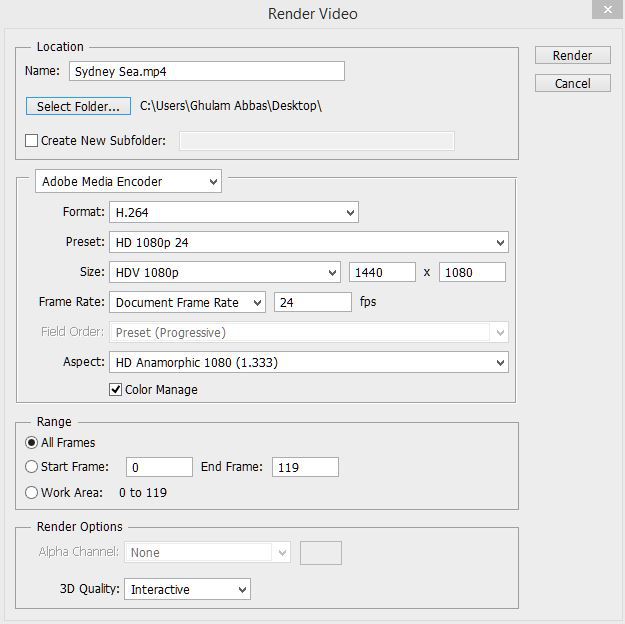
OK, that’s all the Photoshop tips article about how to create animated 3D video using Photoshop. Hope you get something new from Photoshop. And share your projects with us through comment area.

i am an intermediate graphics designer, and IT specialist, so far i was able to use this example to create mine.