How to Create a Virtual Machine in VMWare?
Let’s Create a virtual Machine in VMWare. In the previews article we talk about choosing a software for Virtualization and training lab. You can read the article form “Set Up A Penetration Testing Lab for Hackers“. But know we must configure our lab, installing software and Operating system. Before all we need to create a virtual machine.
A virtual machine is the real simulated machine which let us install an operating system, like Linux, Windows or Mac OS. Later we can connect virtual machines with each other, in order to create a Local Area Network (LAN). For those who are familiar with such an environment, configuring and manipulating of these software are easy, but for newbies it is a bit difficult.
Create A Virtual Machine in VMWare
I assume that you have download and installed VMWare on your computer successfully and ready for first step creating a new virtual machine. Open the VMWare and click Create a New Virtual Machine.
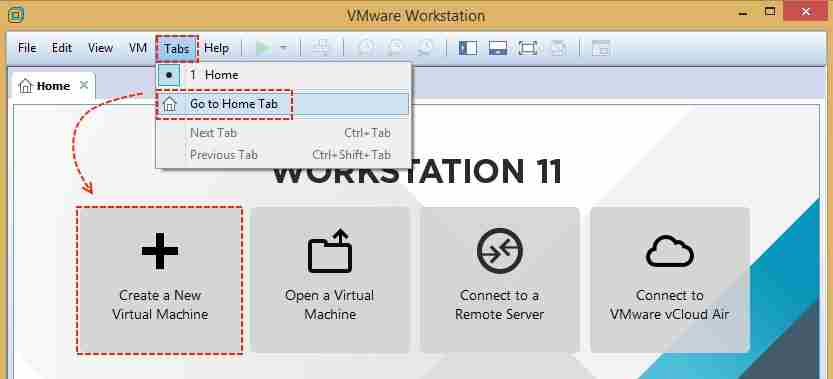
If the home page is not opened, click Go to Home Tab from Tabs menu.
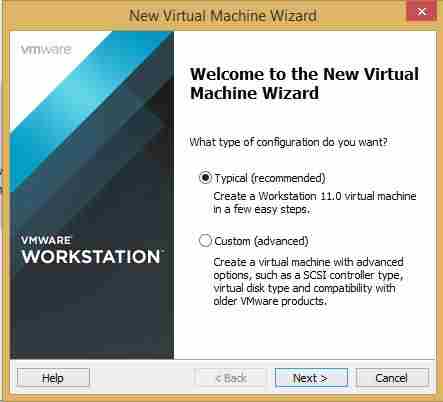
Now on the New Virtual Machine Wizard page select typical (recommended) and click Next. The typical will automatically configure some prerequisite settings of a virtual machine.
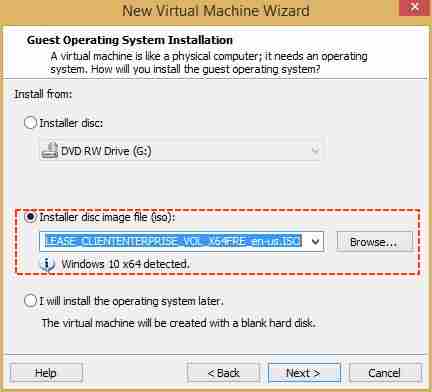
On the Guest Operating System Installation page, click Browse and select the image’s of Operating system you need to install it. Here I have chosen Windows 10 for testing. I’m not going to install it, but if you want to learn the installation of Windows OS, read the article “Install Windows Server 2012 R2 Step by Step“. This is Windows Server 2012 R2, but the installation process is the same as Windows client.
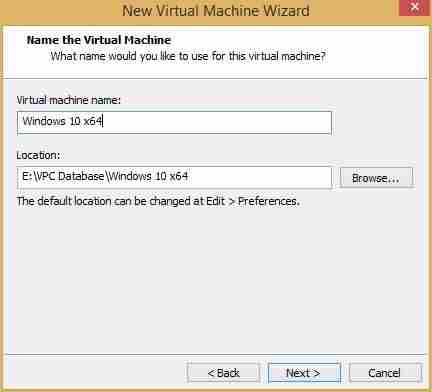
So name the new virtual machine and select the location where you want to store the vhd and configuration files of the machine. It is important to create a new folder for each new virtual machine and keep it away from host system drive. Don? so click Next.
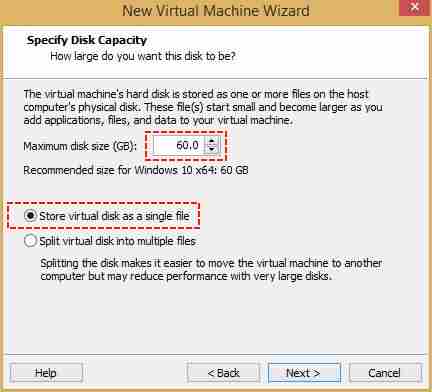
Now specify the disk capacity. By default 60 GB is selected for new machine, but you can decrees or increase it. 60 GB is recommended for Windows 10 x65 bit, for a Linux OS 10 to 20 GB is pretty enough and no need more if you don’t keep files. Don? So Select Store virtual disk as single file and click Next.
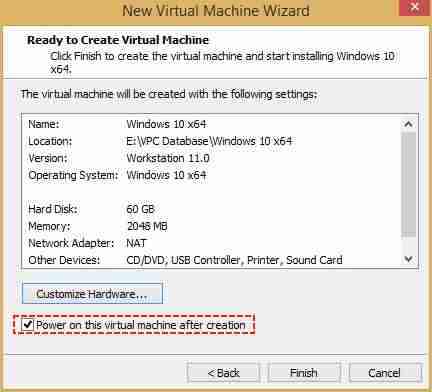
Finally click Finish, the system will create then going to power on the machine. The new created machine will start the OS installation if the Power on this virtual machine after creation has been checked. So I don’t want to install it now.

The creating disk might take time while you are creating a new machine.
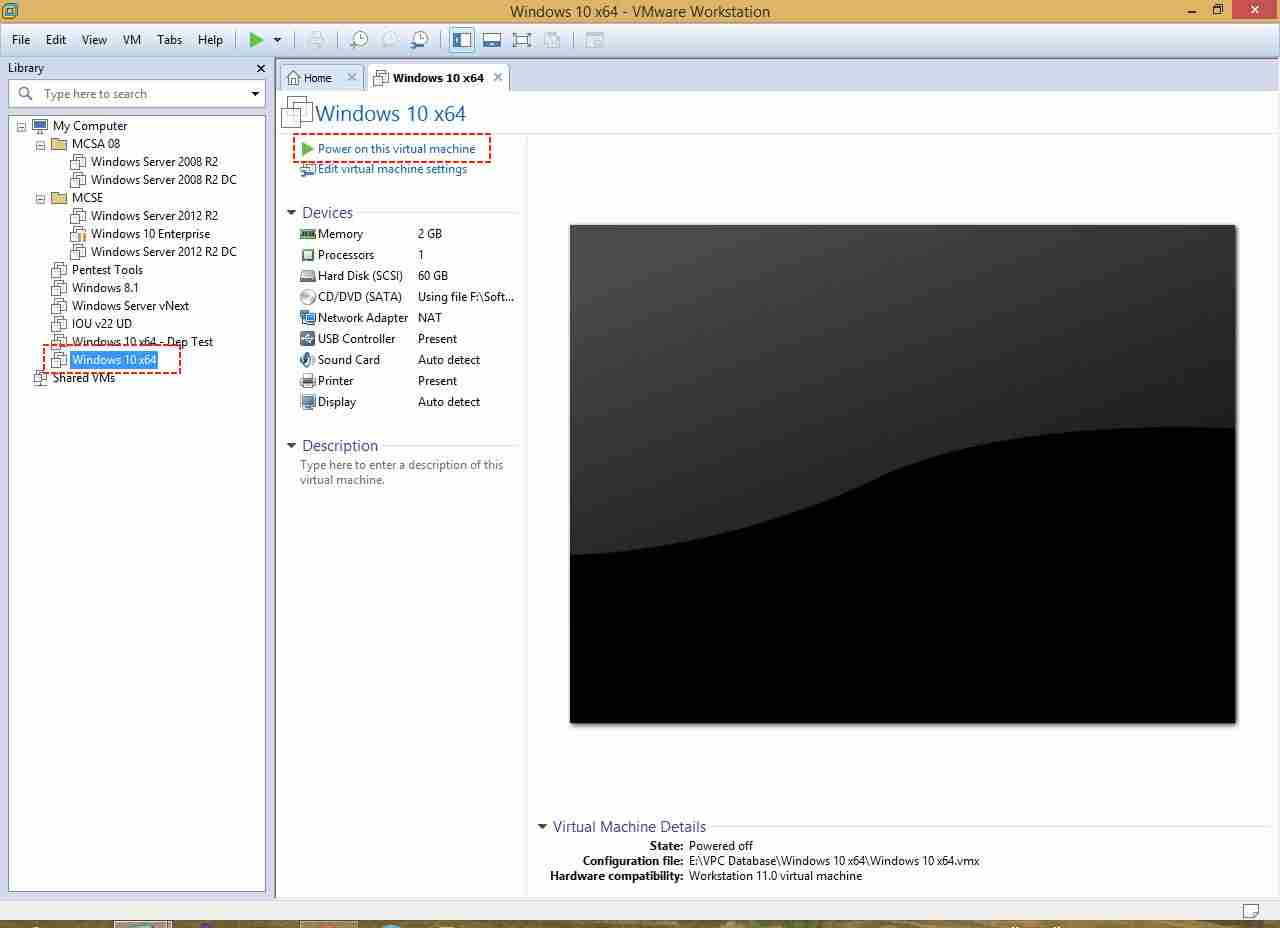
You see the new machine Windows 10 x64 on my Virtual lab. That’s it, click Power one this virtual machine to start your new machine and install OS.
You must create a few more machine in order to completely create a virtual machine. Each machine need space and RAM. To edit a machine settings, click Edit virtual machine settings or right click virtual machine and select Settings.
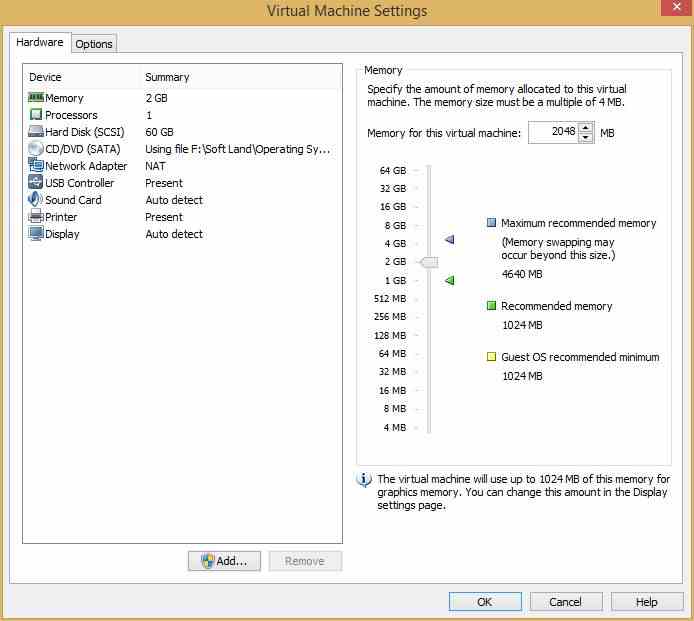
You can specify more RAM, Hard disk, Network card, and even processor. You may need to install Kali Linux on VMware “How to Install Kali Linux on VMWare?” article.
Hop you can create your lab and new virtual machine at your home with out any problems. If it issue any problems, ask through comments and we would like to help you soon.

sir where is VMWare download link please upload download link also thanks
Hi Nowroz Ali
Download from this post https://www.technig.com/set-up-a-penetration-testing-lab/
or go to VMWare website.