How to Configure OSPF Routing Protocol Using Packet Tracer?
Configure OSPF Routing in Packet Tracer to learn OSPF Routing easy
Another post related to CCNA Certification and this time learn how to configure OSPF routing? The configuration of the OSPF routing protocol is easy as RIP Routing. The Open Shortest Path First (OSPF) is a routing protocol for wide area networks and enterprise network. OSPF is perhaps the most widely used interior gateway protocol (IGP) in large enterprise networks. The IS-IS is another link-state dynamic routing protocol, which is more common in large service provider networks. The most widely used exterior gateway protocol is the Border Gateway Protocol (BGP), the principal routing protocol between autonomous systems on the Internet.
OSPF Routing Lab Configuration
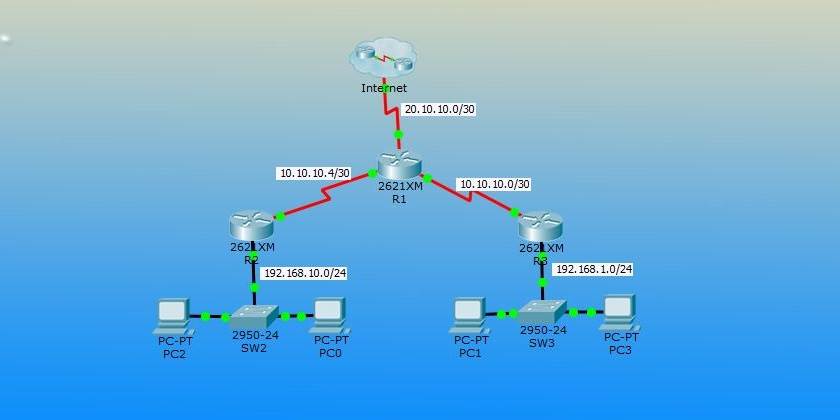
Download the lab from this post or create your own OSPF Routing Lab and try to learn OSPF Routing configuration using this step by step guide.
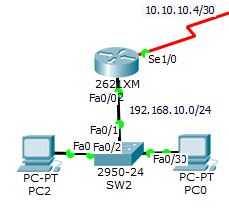
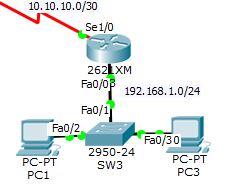
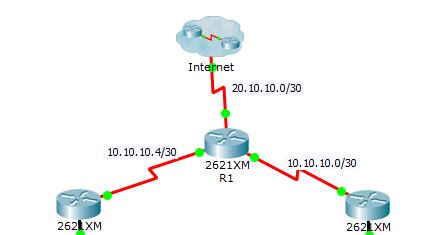
Router 1: Do the basic configuration of your routers, switches and computers. Set the IP address for each interface the same as a screenshot. The diagram is classless IP addresses and sub-netted to many networks. So it means you must familiar with IP sub-netting and VLSM.

R1>enable
R1#configure terminal
Enter configuration commands, one per line. End with CNTL/Z.
R1(config)#interface serial 1/3
R1(config-if)#ip address 20.10.10.1 255.255.255.252
R1(config-if)#no shutdown
R1(config-if)#exit
R1(config)#
R1(config)#interface serial 1/1
R1(config-if)#ip address 10.10.10.1 255.255.255.252
R1(config-if)#clock rate 64000
R1(config-if)#no shutdown
R1(config-if)#exit
R1(config)#
R1(config)#interface serial 1/0
R1(config-if)#ip address 10.10.10.5 255.255.255.252
R1(config-if)#clock rate 64000
R1(config-if)#no shutdown
Router 2: Do the following configuration for Router 2.

R2(config)#interface serial 1/0
R2(config-if)#ip address 10.10.10.6 255.255.255.252
R2(config-if)#no shutdown
R2(config-if)#exit
R2(config)#interface fastEthernet 0/0
R2(config-if)#ip address 192.168.10.1 255.255.255.0
R2(config-if)#no shutdown
Router 3: Now try to set IP address for Router 3 interfaces also.

Router#enable
Router#configure terminal
Enter configuration commands, one per line. End with CNTL/Z.
Router(config)#hostname R3
R3(config)#interface serial 1/0
R3(config-if)#ip address 10.10.10.2 255.255.255.252
R3(config-if)#no shutdown
R3(config-if)#exit
R3(config)#interface fastEthernet 0/0
R3(config-if)#ip address 192.168.1.1 255.255.255.0
R3(config-if)#no shutdown
Good, the basic configuration has competed and now start configure OSPF routing protocol on this network.
How to Configure OSPF Routing Protocol?
The Lab is ready for routing, download and configures OSPF routing with the following step by step guide. In router, R1 configure OSFP routing with Router OSPF command.

R1>enable
R1#configure terminal
Enter configuration commands, one per line. End with CNTL/Z.
R1(config)#router ospf 1
R1(config-router)#network 20.10.10.0 0.0.0.3 area 0
R1(config-router)#network 10.10.10.0 0.0.0.3 area 0
R1(config-router)#network 10.10.10.4 0.0.0.3 area 0
R1(config-router)#
The router OSPF command enables OSPF routing on the router, and the 1 before OSFP is the process ID of the OSFP Protocol. You can set different process id from “1-65535” for each router.
The network command with network ID “network 20.10.10.0” is the network identifier, and the “ 0.0.0.3″ is the wildcard mask of 20.10.10.0 network. Wildcard mask determines which interfaces to advertise because OSPF advertises interfaces, not networks.
Now go to Router R3 and configure with the following commands.
R3>enable
R3#configure terminal
Enter configuration commands, one per line. End with CNTL/Z.
R3(config)#router ospf 1
R3(config-router)#network 192.168.1.0 0.0.0.255 area 0
R3(config-router)#network 10.10.10.0 0.0.0.3 area 0
Don? So do the following for router R2.
R2>enable
R2#configure terminal
Enter configuration commands, one per line. End with CNTL/Z.
R2(config)#router ospf 1
R2(config-router)#network 192.168.10.0 0.0.0.255 area 0
R2(config-router)#network 10.10.10.4 0.0.0.3 area 0
OK, OSPF routing configuration has been finished successfully, now test your network whether they can ping with each other or not. In my Lab they work perfect, you can download and see the result. Configure OSPF Routing Protocol – Complete Lab.
Related Search:
OSPF configuration step by step.
how to configure OSPF between two routers.
how to configure OSPF on Cisco router packet tracer.
OSPF configuration in packet tracer.
OSPF basic configuration.
simple OSPF configuration example.
OSPF routing protocol configuration pdf.
how to configure the router in packet tracer.
how to configure OSPF step by step.

Just a suggestion, but I connected another serial between R2 and R3 using 10.10.10.8/30 and added those networks to OSPF. This allowed me to shut down a serial interface on any of the serial links and witness OSPF topology update accordingly to take another path, then watch again as I no shut the interface. This might be a good thing to add to the lab?
Hi Chris, thanks for suggestion and I’m glad you found the article helpful.
It’s a simple lab to configure OSPF on Cisco routers for new students. Everyone can add and change the lab whatever they want.
Thanks for this great help, I’m very satisfied just finding this.
Your welcome my friend, I’m glad you find the article helpful.
I think there is a “mistake” in your configuration. In fact, you do not advertise internet by this command :
R1(config)#router ospf 1
R1(config-router)#network 20.10.10.0 0.0.0.3 area 0
Here, you include internet on your area 0.
I think the right configuration to do here, is to do a default static route on R1 and share it to the others by ospf like that :
router ospf 1
passive-interface Serial1/3 #do not send Hello packets on this interface
network 10.10.10.4 0.0.0.3 area 0
network 10.10.10.0 0.0.0.3 area 0
default-information originate #send default route to others routers in the area
!
ip route 0.0.0.0 0.0.0.0 Serial1/3
🙂
sir thanks, this configuration was very helpful. sir, i have a problem in my project so please help me …below is the name of my project.
Configuration And Comparison of IPv6 Routing Protocols (RIPng,OSPFv3,BGPv4)Using Packet Tracer Simulator
and analyzing on OPNET.
kindly give my your email for further help…thanks
Hi! I really wanted to learn more but I can’t open the packet tracer file. what version did you used? Thank you…
Hi,
You can use the student edition of Packet Tracer.
3 years on, and the packet tracer file STILL DOES NOT OPEN! someone complained about it three years ago, and it’s STILL NOT FIXED! LOL!
Thanks for the heads up. Post updated.