The IP address configuration is easy when you configure it using GUI. But do you know how to configure IP address using PowerShell or even command prompt (cmd)? Good if you know, but if you don’t know just follow this step by step article about configuring IP address using PowerShell.
I have written an article about configuring IP address with the command line before. You can read it from configure IP address with CMD or command prompt using Network Shell or Netsh utility.
Configure IP Address using PowerShell
Let’s start configuring IP address with Powershell.
1. Run PowerShell as administrator by searching PowerShell on Windows search and pressing Ctrl+Shift then press enter. It will open the PowerShell as an administrator. Or right click the PowerShell and click Run As Administrator.
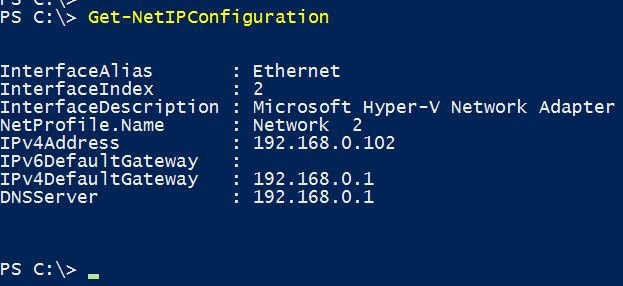
2. To display the current system IP configuration type “Get-NetIPConfiguration” and press enter. It works the same as “Ipconfig” on Windows command prompt and “Ifconfig” command on Linux.
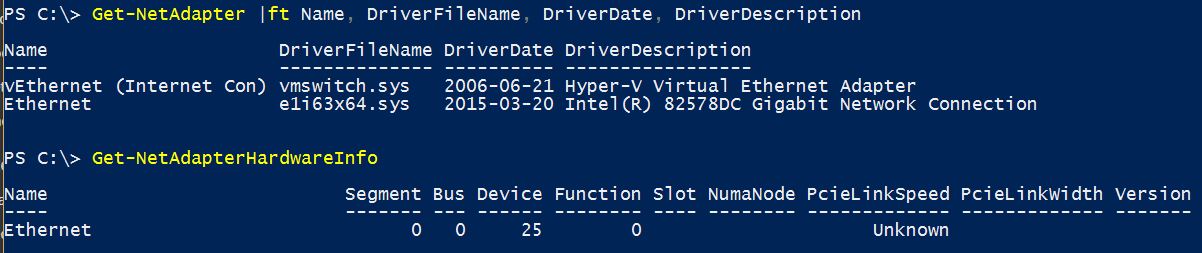
3. The “Get-NetAdapter” command shows all network adapters on your computer. It displays the virtual network adapters as well.
The following command will help you find more information about network adapters. The “Get-NetAdapterHardwareInfo” shows hardware information and…
For example type “Get-NetAdapter | ft Name, DriverFileName, DriverData, DriverDescription“.
There are more parameters for Network Adapter cmdlet, so try to find them with “Get-Help Get-NetAdapter -Detailed” command.
That’s all, you need to work with PowerShell to learn more about network adapter configuration or configure IP address with PowerShell.
Configure IP Address with PowerShell
Like the old network shell (Netsh), you can configure IP address with PowerShell as well. It’s just changed to PowerShell cmdlet.
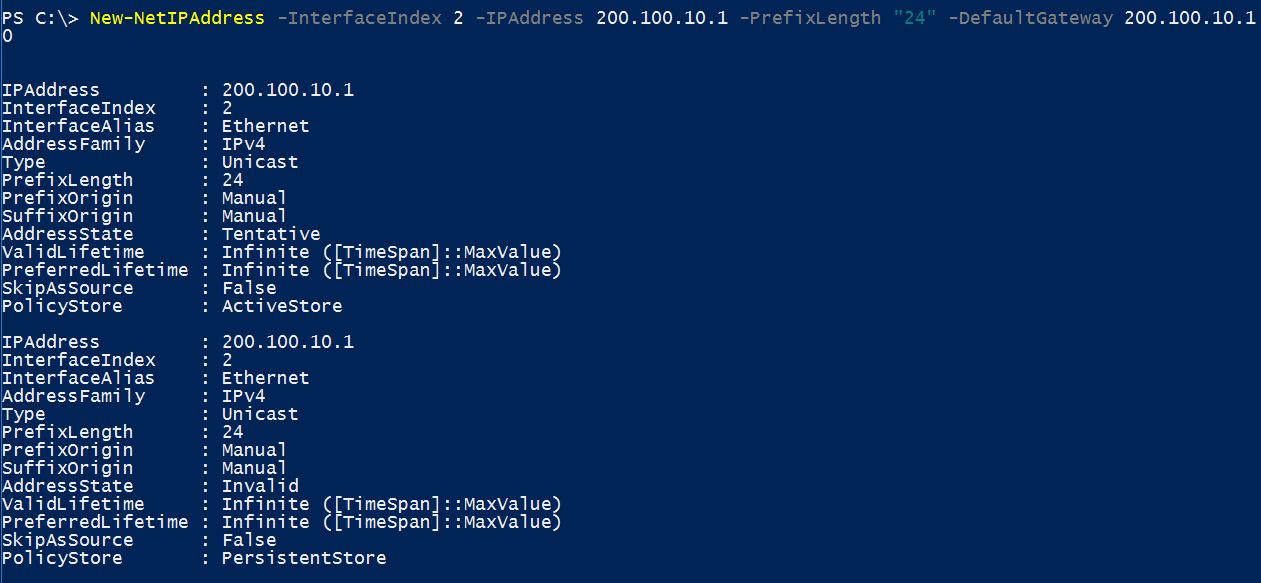
1. To change IP address, do it with “New-NetIPAddress“.
New-NetIPAddress -InterfaceIndex 2 -IPAddress 200.100.10.1 -PrefixLength 24 -DefaultGateway 200.100.10.10
Index 2 is the index number of my network adapter on Windows 10. You can find the index number with “Get-NetAdapter“.
2. To set DNS address use the “Set-DNSClientServerAddress“.
Set-DnsClientServerAddress -InterfaceIndex 2 -ServerAddresses 200.100.10.50
To set alternate DNS server just add the second DNS address with a comma.
Set-DnsClientServerAddress -InterfaceIndex 2 -ServerAddresses 200.100.10.50, 200.100.10.100
To check the result type “Get-NetIPConfiguration” and press enter. It will shows all adapters IP configurations.
Rename Network Adapter
To rename a network adapter, type “Rename-NetAdapter -Name Ethernet -NewName IntConnection” and press enter. The Ethernet is the old name and the IntConnection is the new name.
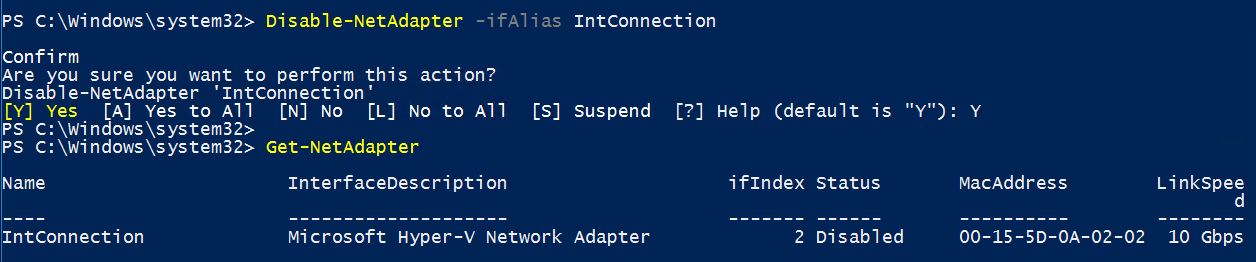
Disable Network Adapter
To disable a network adapter, simply type “Disable-NetAdapter -ifAlias IntConnection” and press enter. Just type Y to disable network adapter with PowerShell.
Enable Network Adapter
Do the same as disable the network adapter and replace the disable to enable and press enter to enable network adapter with PowerShell.
Done! Hope you learn something about configuring IP address using PowerShell.
Thank you very much. These commands were very helpful.
Hello,I log on to your blog named “How to Configure IP Address Using PowerShell? – Technig” daily.Your story-telling style is awesome, keep it up! And you can look our website about proxy free list.
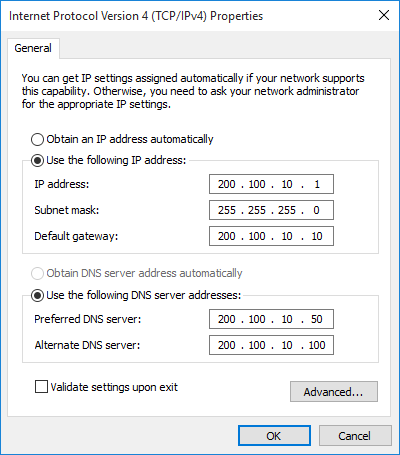
How do you set it back to obtain IP address automatically (DHCP)?