How to Backup Data Using File History in Windows 10?
The File History feature in Windows 10 and 8.1 is an easy way to backup personal files to a hard disk or flash drive. To backup data using file history and restore files works better and easier than the old version of Windows Backup in Windows Vista and Windows 7. So let’s see how do I backup data using file history in my computer using USB drive.
Backup Data Using File History
Before backup data using file history, you must enable this feature from Windows Settings or Control Panel. Both of them work the same but I prefer to configure it through control panel.
Requirement:
- An extra hard disk or USB drive. If you don’t have extra hard disk, create a Virtual Hard Disk and Backup files. I don’t recommend to use virtual hard disk. Your physical hard disk might corrupt and you will lose the entire files and backups.
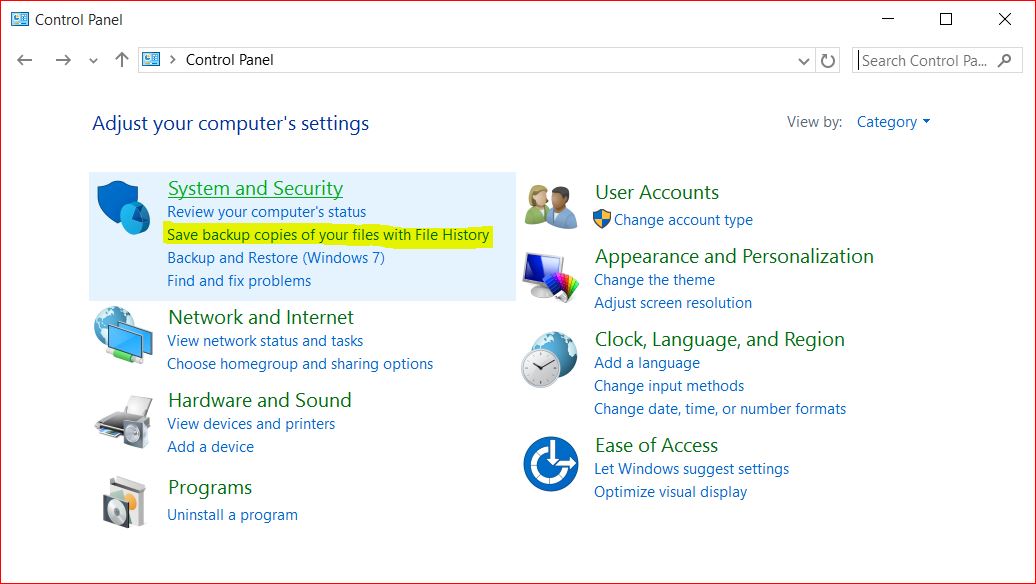
1. Go to Control Panel of your Windows and click Save backup copies of your files with File History or simply find File History trough Windows search box.
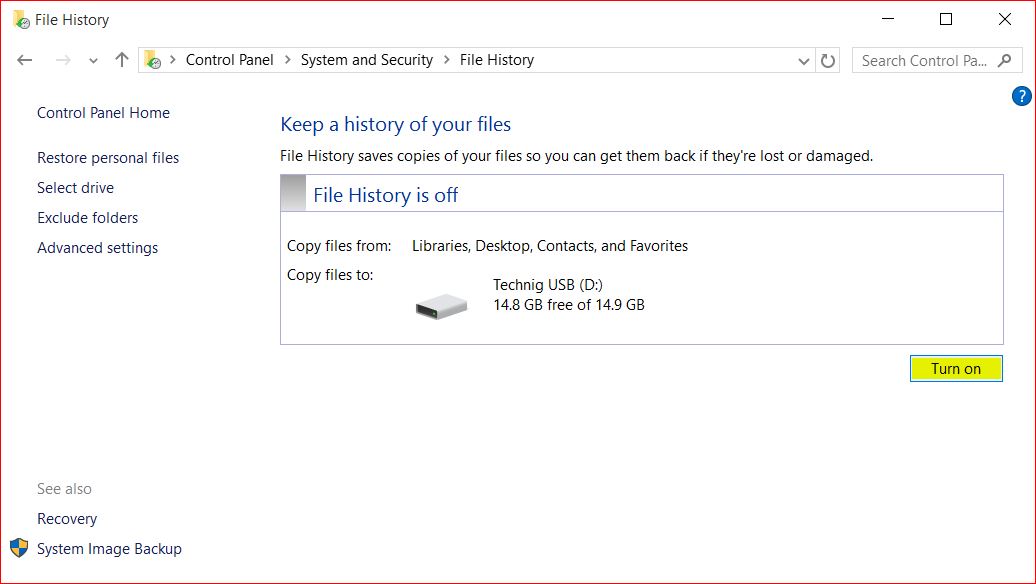
2. On the File History window click Turn on button to enable file history.
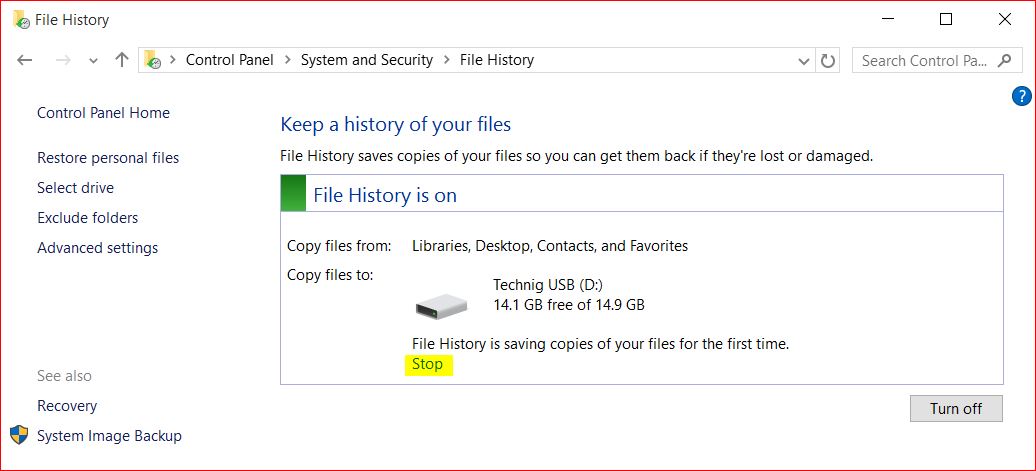
3. Now the File History is tuned on and enabled. You can stop the file history feature by clicking the Stop link under the selected disk for backup.
That’s all. File History has been enabled successfully in your Windows 10. So let’s configure some important options of File History, like changing drives, select exclude folders, advanced settings and finally Restore Personal Files.
1. Change File History Backup Disk
This option let you to select another disk instead of current disk. Sometime you need to change the backup drive, just click Select Drive from file history panel.
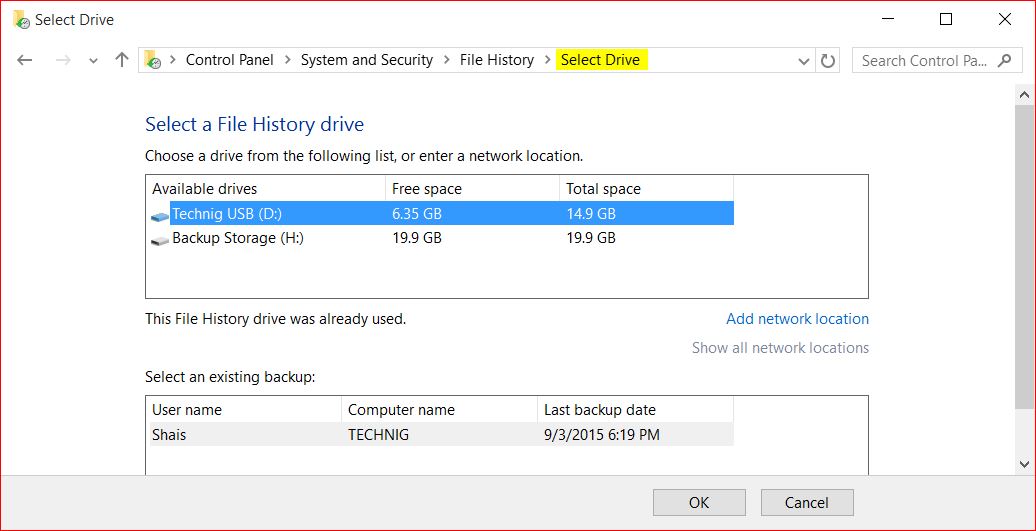
In order to change the drive, select the new disk and click OK to change it. Then the File History ask whether you want to move the existing file to new disk. If you want to move them click Yes to move the preview backups to new Hard disk. otherwise click No and continue.
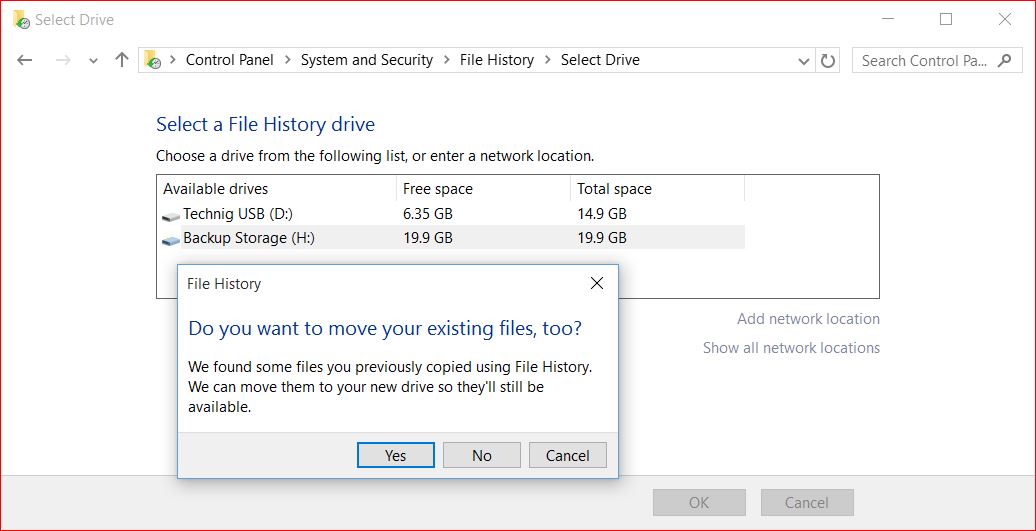
No the drive has changed successfully and the files schedule to backup to new hard disk.
2. Prevent Backups from Excluded Folders
The file history completely backup a profile’s files and libraries. Sometime we don’t want to backup some folders in a user profile. So you can exclude the folders from Exclude Folders of File History.
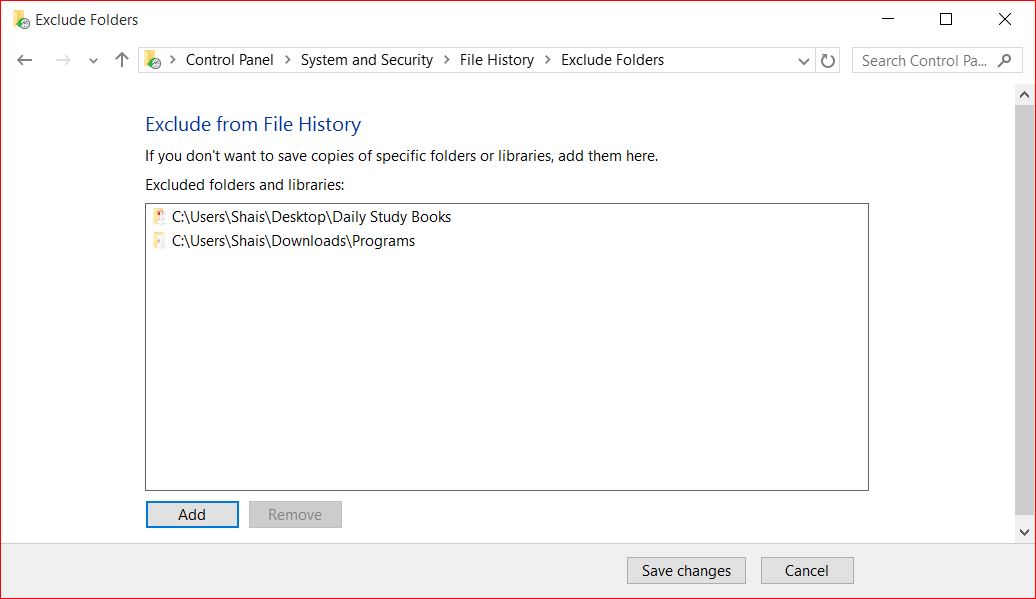
To perform this, simply add the folders you don’t need to backup the contents.
3. Advanced Settings of File History
From advanced settings of File History you can the change and modify the backup schedules.
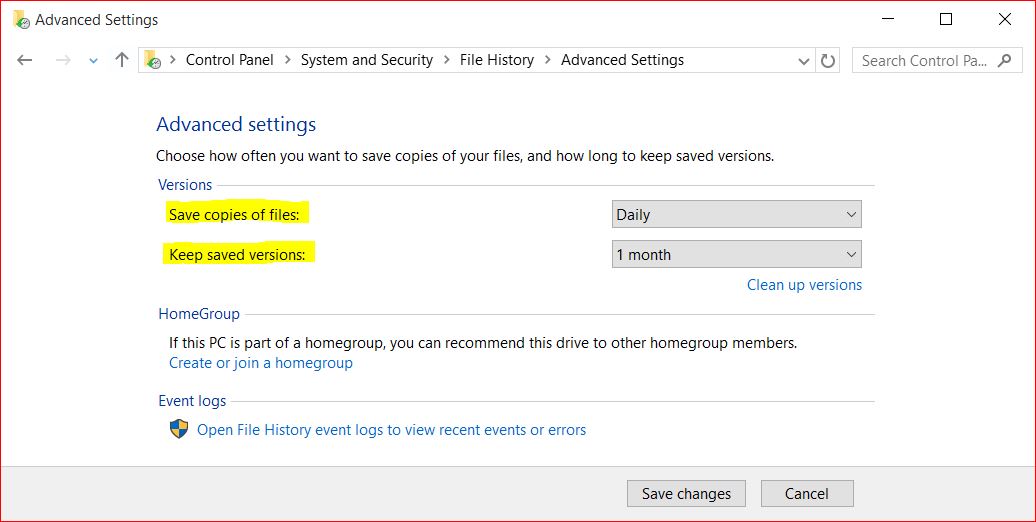
Saving copies of file hourly of daily. The next is Keeping saved version of files forever of just a month. You can change whatever you want and finally click Save changes to apply the settings.
4. How to Restore Personal Files from Backups?
Time to know how to restore the lost files? To do so click Restore Personal Files from File History panel. Then select the exact version and files you need to restore.
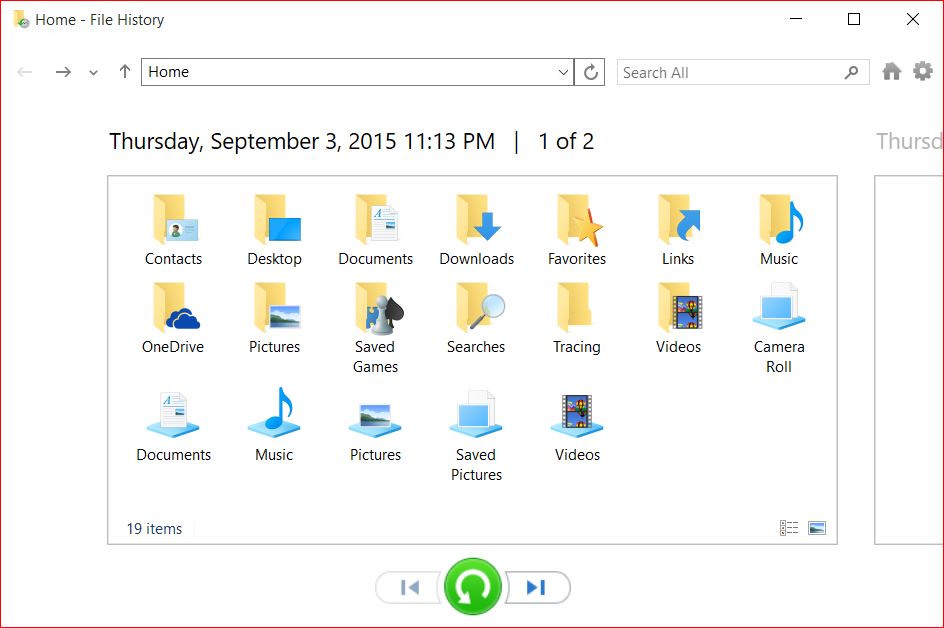
Here I want to restore a photo from Picture folder. You can restore a file or a complete folder with files and sub-folders.
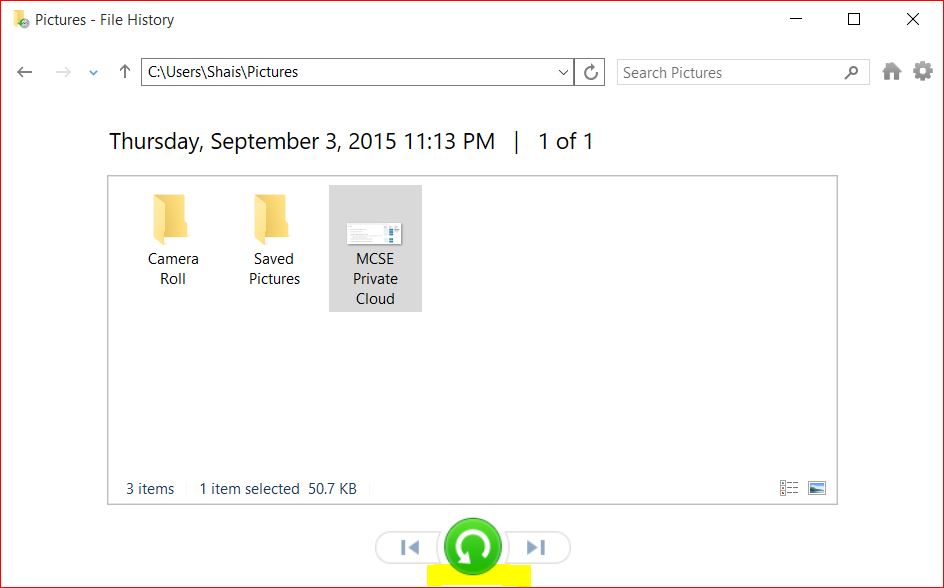
Yes that’s it. Select the picture and click the big green restore button to restore the file.
The Final word
The File History feature is the easiest way to backup personal files. Enable File History by the help of this Backup Data Using File History article and create a backup schedule for personal files to protect your data from deletion.
Related Search to Backup Windows 10 with File History.
Windows 10 file history backup.
What does file history backup.
Backup windows 10 to usb.
Backup windows 10 to onedrive.
Windows 10 backup network drive.
System image windows 10.

It was helpful for me. thanks
Thank you for comment dear Mehdi.