How to Design a Bird Logo Inspiration in Photoshop?
There are many different logos all over the internet, today I have decided to show you how to create bird logo inspiration with Photoshop. While creating this project you will be introduce with pen tool, layer effects like bevel & emboss, outer glow, drop shadow, satin and at last the most important one and only is layer style from Blending options.
Design Bird Logo Inspiration
1. Create a new document by width of 832 pixels and 567 pixels’ height with 300 resolutions. After that fill it with black color by pressing Alt+ Backspace.
2. Press P to select Pen Tool and then draw something like this, if you can’t draw by your own self then open the 01- bird logo inspiration image and then with pen tool selected draw it like screenshot.
Note: Remember settings of pen tool must be in shape mode.

3. After drawing the bird shape it is time to apply effects on the bird to look more attractive. Go to bird layer, right click and select blending options. Let’s start applying effects from drop shadow, and apply these settings like screenshot.
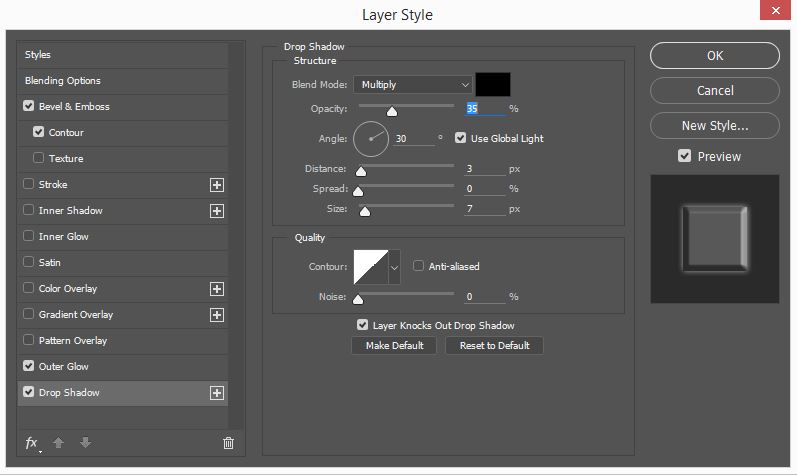
4. After applying the drop shadow settings, go to Outer glow and put it’s blend mode to screen, opacity of 35%, Noise of 0%, and see other options in screenshot.
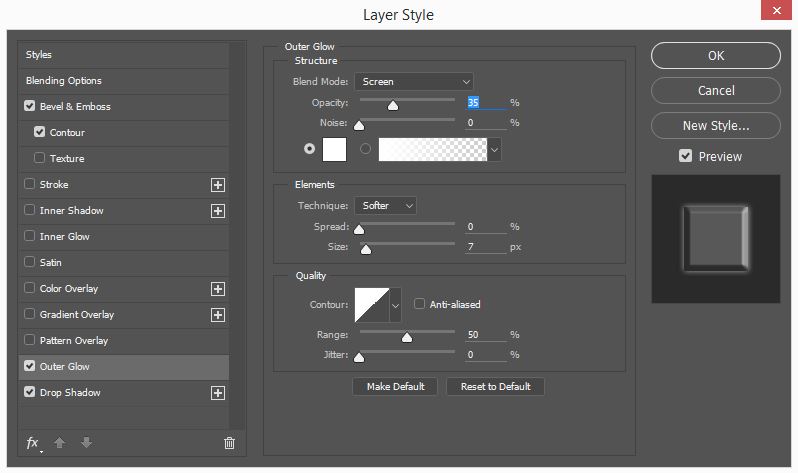
5. After applying those settings for drop shadow and outer glow go to Bevel and emboss, put its style to inner shadow, Technique of smooth, Depth of 1000, Direction to up and many more setting which you see like screenshot.
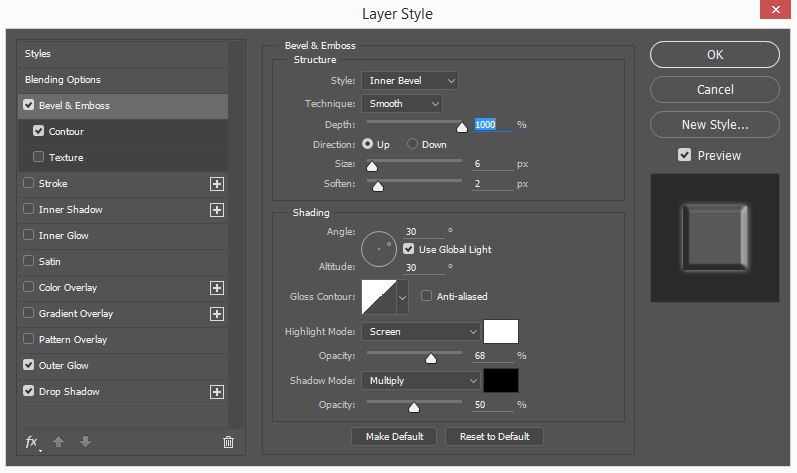
6. For contour settings put its amount 50 and you will have this effect like screenshot.

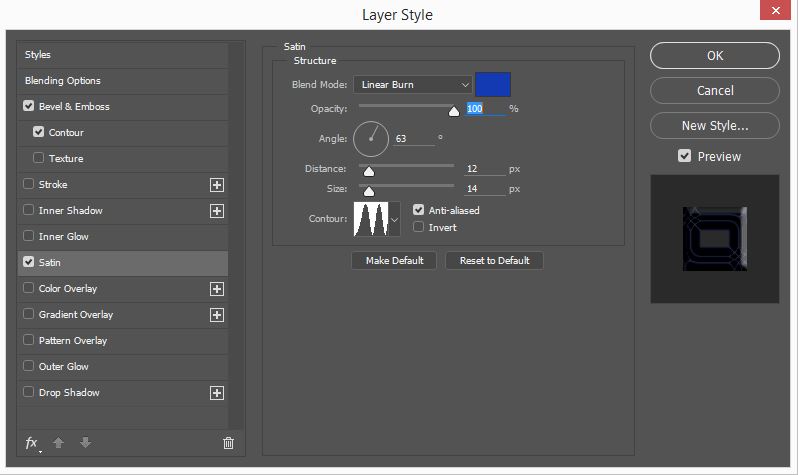
7. Next duplicate it by pressing Ctrl+ J the bird layer, remember the effects must be applying too, if it didn’t again duplicate it and select both copied bird image and then press Ctrl+ E to merge them. After duplicating, applying the effects again right click and select blending options, this time select satin and apply these settings like screenshot.
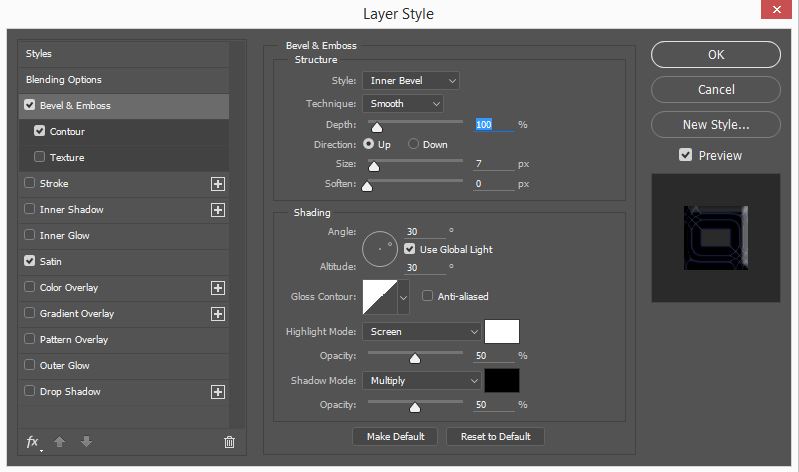
8. After applying the settings for satin, check again bevel & Emboss and again apply these settings like screenshot. And for contour settings put its amount to 50.
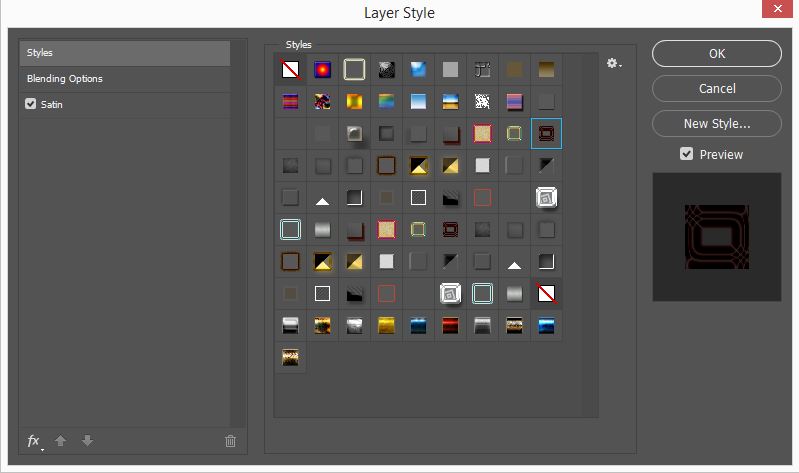
9. The last thing which is so important is applying style to the bird. In order to apply style effect, click on the style to the top which you can see and then select the one which is bordered with blue color like screenshot.
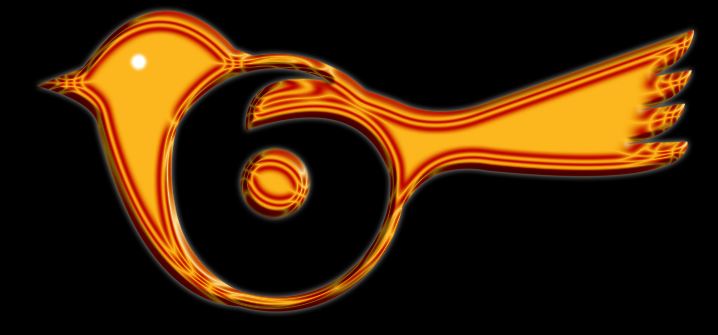
10. Excellent till this step you have created your logo and it seems like screenshot.
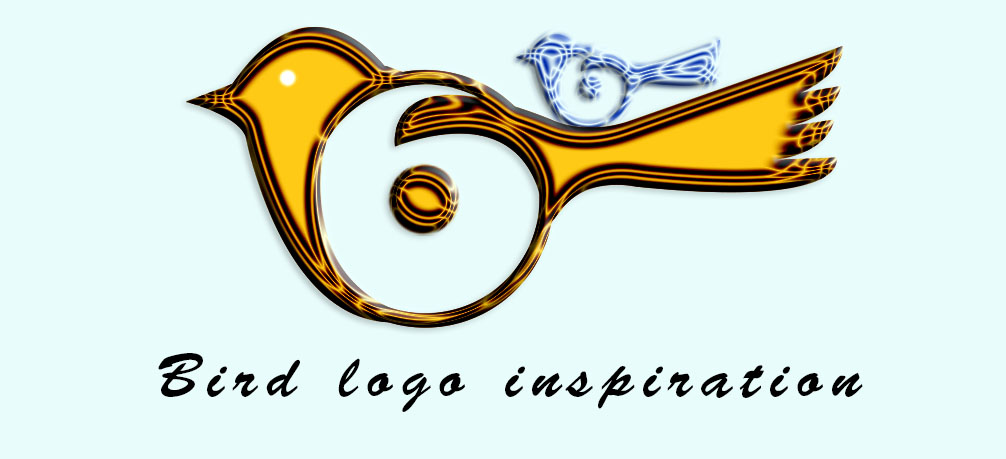
With some editing and apply different affects you can change complete design of yourself, I only copied and again with some other effects.
I hope you have learned something from this lesson of Photoshop Tips, your comments and feedback will make my Articles better.
