Create a custom tab in Microsoft Office 2019
Many Options are placed in Microsoft Office 2013 Ribbon. While working with Office Applications, most of the time we feel crowded. So on sometimes it is difficult to find an option or command that we feel to work with.
For easy and better use also to stop the wastage of time, Microsoft Office gives us the opportunity to manage and group the tools which we want.
Here are some steps to create a Tab, Groups and manage tools inside groups in Microsoft Office 2013 Applications.
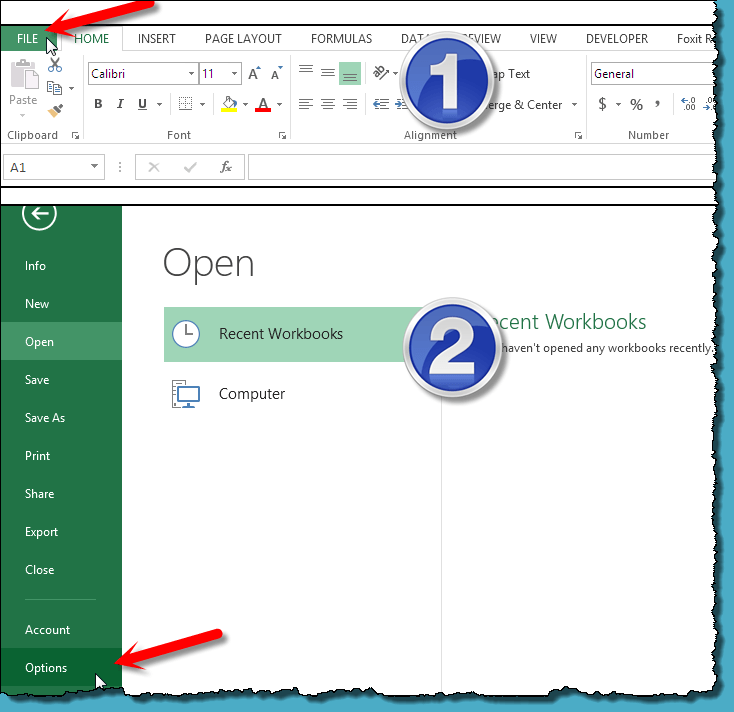
First Step: Open an Office Application.
No 1. Move to Backstage View through FILE Tab.
No 2. Select Options from the Left Sidebar.
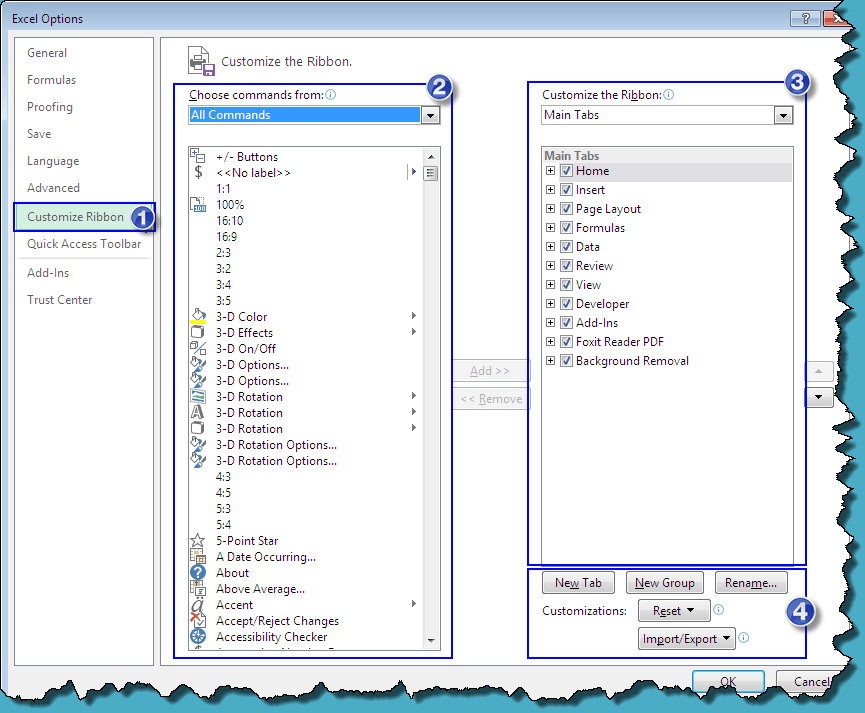
Second Step: All the Information you need about the “Customize Ribbon” Option.
No 1. Go to “Customize Ribbon”.
No 2. Choose All Commands from the drop-down button.
No 3. Navigate to Main Tabs by drop-down button.
No 4. Shows Modification Buttons
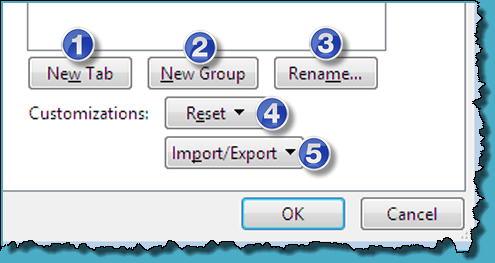
Third Step: Customizing the Ribbon in Office 2013
No 1. Press to Create a New Tab.
(A new group will automatically created after pressing New Tab.)
No 2. Click to Create a New Group.
No 3. After Creating Tabs and Groups you can rename them by clicking on this button.
No 4. If you don’t want the changes applied on your ribbon area, you can reset them.
No 5. Through this button you can Export your “Main Tabs” setting as a file, so earlier you can import them after re-installation of Office.
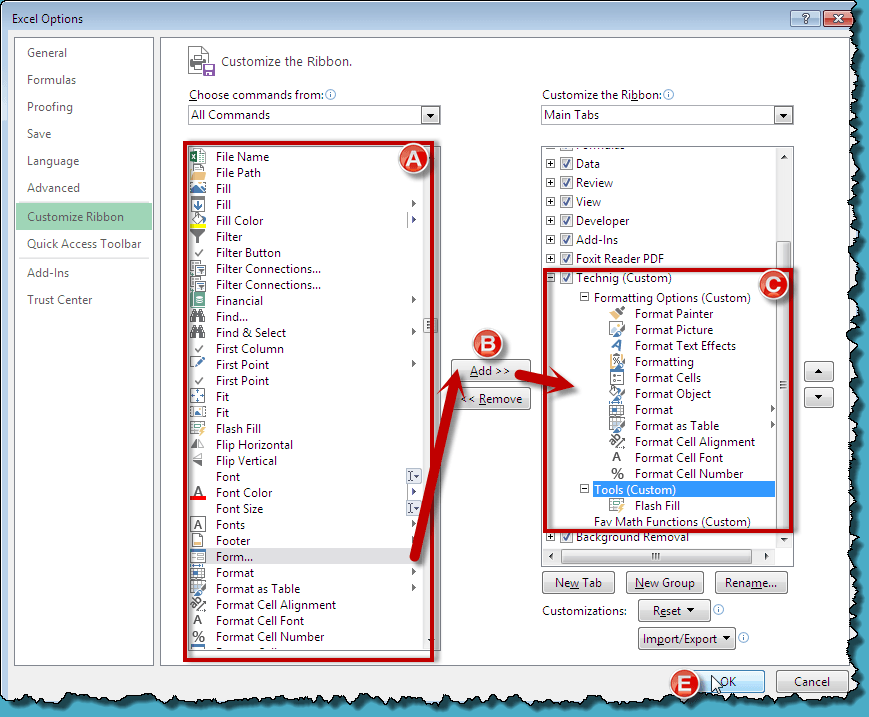
Fourth Step: After creating Tabs and Groups, in order to add options inside a group select it.
For A: Select a command.
For B: Press “Add” Button.
For C: See the commands you’ve added to different groups.
For E: After you find satisfied yourself with the changes applied, click OK to continue.
Fifth Step: Find your Tab along other Office Tabs.
Here is our New Tab:


